I have several new recipes set to post, but the computer I am currently using is a real PITA when it comes to uploading photos. I will be back at home this weeked, so expect several new blog posts on Monday! Sorry for the delay. :(
Check out some of my previous favorites while you're here:
Bean and Corn Salsa
Chocolate Chip Zucchini Bread
Cornish Game Hens with Fingerling Potatoes
Paco's Pepper Snacks
Summer Pasta

Thursday, April 29, 2010
Tuesday, April 27, 2010
Homemade Frozen Pizza
Whenever my parents go on vacation, I am the go-to person to house and dog sit. It's a win-win situation because they get someone to take care of the house for free, and they live about 10 miles from the school I work at, versus the 32 miles I normally have to commute. The only kink in the situation is the husband (as in my husband); he doesn't cook and will eat fast food for dinner every night if given the option.
Usually I just leave him to his own devices, but this time I decided to prepare some meals for him in advance. But then I got a bit lazy, so I decided to just make him a bunch of frozen pizzas. As I was making them, I figured this would be a great meal to make for new parents, or just to keep on hand in my freezer, rather than buying frozen pizzas from the store.
I made a total of 4 pizzas, two BBQ chicken and two carne asada, two large and two medium. I made the large pizzas so he'd have leftovers for lunch as well. A grapefruit sized hunk of dough will yield a large pizza.
Homemade Frozen Pizzas
Source: A Cooking in Cucamonga Original
Printable Recipe
Ingredients
Olive Oil Dough (I used half wheat and half white flour)
Your favorite toppings
Directions
Pre-heat the oven, with a pizza stone on the middle rack, to 525 degrees.
Line up for pieces of parchment paper on the counter and sprinkle each with cornmeal.
Rub you hands with olive oil and divide the dough into four chunks (you can divide it into smaller hunks if you want more personal sized pizzas). Using your hands, stretch the dough to your desired size and thickness. Re-oil your hands if the dough starts to stick to your skin.
Bake each crust for 4 minutes. (I baked mine one at a time, as that's all I could fit on my stone.)The dough will be slightly browned and puffy, but still soft.
Top with whatever toppings you like. Place the pizzas in the freezer, on cooling racks, for about 20-30 minutes. This will firm up the sauce and cheese before wrapping.
Wrap each pizza in two large pieces of foil, folding over the edges to seal it up. You can also put the pizzas in large freezer bags if desired.
Stack and freeze.
Directions for cooking the frozen pizzas
Pre-heat the oven to 475 degrees, with a pizza stone on the middle rack. (It's ok if you don't have one, the crust just won't get as crisp.)
Unwrap the pizza and cook directly on the stone, or the oven rack if you don't have a stone. Cook for 4-5 minutes, or until the cheese is melted, golden and bubbly.
Enjoy!
Monday, April 26, 2010
BBQ Chicken Pizza

It's been awhile since I've made pizza, so when I recently made a new batch of dough, I wanted to try some new toppings. The husband and I like to pick up a box of CPK's frozen BBQ chicken pizzas every now and then, so I figured why not try out a home made version?
I used a half wheat, half white flour crust (only because I ran out of whole wheat flour and didn't want to run to the store), spread with a sweet BBQ sauce, and topped with a mix of cheese. This pizza was delicious! And it was a nice break from our usual tomato sauce pizzas. You can see some turkey pepperoni in the picture up there; I didn't feel they really added anything to the flavor (I couldn't even really taste them, actually), so I've omitted them from the ingredients list below. You could certainly experiment and add them to your pizza though.
I can't say that this BBQ pizza is better than CPK's, but it was a good at-home alternative. I even made a few extras to freeze for later!
BBQ Chicken Pizza
Source: A Cooking in Cucamonga originial
Printable Recipe
Ingredients
Olive Oil Pizza Dough (grab a piece about the size of a grapefruit)
1 chicken breast or 2 thighs, grilled and cut into small chunks
2 green onions, thinly sliced
1/4 cup cheddar cheese, shredded
1/2-3/4 cup mozarella cheese, shredded
1/4 cup of your favorite BBQ sauce
cornmeal for dusting
Directions
Pre-heat the oven, with a pizza stone on the middle rack, to 525 degrees.
Sprinkle a piece of parchment paper with cornmeal to prevent the dough from sticking. Using your hands, stretch out the pizza dough to your desired size and thickness; the husband and I prefer a thinnner crust.
Note: I've found this dough is easiest to work with if I coat my hands in olive oil first-it prevents the dough from sticking to my skin.
Spread BBQ sauce all over the pizza, leaving about a 1/2" border all around the edge--this will form the crust. Top with both cheeses, the sliced onions, and the chicken.
Bake on the pizza stone (you can leave the pizza on the parchment) for about 8 minutes, or until the cheese is melted, golden and bubbly.
Wednesday, April 21, 2010
Chicken and Veg Stir Fry, Version 2

I recently made this stir fry, using bags of frozen veggies I had on hand. We thouroughly enjoyed it, and since stir fry is an easy (if a bit time consuming) dinner, I decided to make it again. This time I had a bunch of different fresh veggies in the crisper, a can of baby corn in the pantry, and chicken breasts rather than thighs, so it was practically a whole new dish.
Start a pot of brown rice (I use my rice maker) while you chop up the veggies and the rice will be done right about the time you are ready to plate your stir fry.
On another note, I've been showing Jaime Oliver's Food Revolution to my journalism students lately, and they are loving the show. I gave them some time in the computer lab to check out his website and many of them were searching for the stir fry recipe Jaime made on the show! Too cute.
Chicken and Veg Stir Fry
Source: A Cooking in Cucamonga Original
Printable Recipe
Ingredients
2 boneless, skinless chicken breasts
3 Tablespoons cornstarch
1 Tablespoon rice vinegar
1 Tablespoon low sodium soy sauce
2 Tablespoons sesame oil, divided
1/2 teaspoon ground ginger
3 cloves garlic, minced
1/2 teaspoon pepper
2 Tablespoons vegetable oil
1/2 teaspoon garlic salt
1 large red bell pepper, chopped
1/2 onion, chopped
2 cups green beans, cut in half
2 cups asparagus, cut into thirds
1 can baby corn, drained
1 can bamboo shoots, drained
1/2 teaspoon chili paste
1 cup water + 1 teaspoon chicken or vegetable bullion
Directions
Cut up the chicken breasts into small chunks and put into a ziplock bag. Add the cornstarch and shake, ensuring that all chicken pieces are coated. Add the rice vinegar, soy sauce, 1 tablespoon sesame oil, ground ginger, minced garlic, and pepper. Shake to coat and let marinate 10-30 minutes.
Heat the vegetable oil in a large wok until hot. Add the chicken and cook about 4 minutes, until chicken in no longer pink.
Remove chicken from the wok and set aside.
Heat the remaining 1 Tablespoon sesame oil in the wok. Once it is hot, add all of the vegetables, sprinkle with garlic salt and add the chili paste . Stir fry until heated through and crisp. Add the chicken back to the wok, pour in the water with bullion. Cook for another 3-4 minutes, or until the sauce has thickened.
Serve over rice.
Tuesday, April 20, 2010
Happy Anniversary to Us!

Yesterday was the husband and I's 2nd wedding anniversary; I can't believe it's already been two years since I walked down the aisle with my dad, Tim McGraw's "My Best Friend" playing, while Omar stood waiting at the alter for me. Our wedding was a ton of fun, with an open bar and all of our friends and family there to celebrate with us.

To celebrate our 2nd anniversary, the husband and I went on a tour of a local brewery, topped off with several of their beers. And I may have found some more oranges on the way home... The husband, as always, rocked it in the gift department. He bought me a Lady Gaga CD (my new musical obsession), Chelsea Handler's new book Chelsea, Chelsea, Bang, Bang, and David Lebovitz's ice cream book, The Perfect Scoop! Yes, the book I have referenced on Google Books many times; he saw me drooling over it on Amazon and knew that I *had* to have it. :) I got him the new Grand Theft Auto for PS3, which he was seriously coveting.
Just as we do with most special occasions, we opted to stay at home and make dinner, rather than go out. I didn't make anything new, choosing instead to stick with some of our favorites!
The menu:
BBQ ribs with a dry rub
Grilled Stuffed Potatoes
Strawberries and Cream Cake
Champagne
Monday, April 19, 2010
Zucchini Fries

As soon as I saw this recipe for zucchini fries I immediately bookmarked it as something I wanted to try right away. While these are nothing like potato french fries, of course, they are so yummy. The panko gives the zucchini a crispy crunchy coating and the oven roasting brings out a slightly sweet flavor in the zucchini itself.
Zucchini Fries
Source: Adapted from Le Petit Pierogi
Printable Recipe
Ingredients
3 zucchini, cut into sticks
3 eggs
4 Tablespoons milk
1 cup whole wheat flour
1 1/2 cups panko breadcrumbs
4 Tablespoons grated Parmesan cheese
2 teaspoons season salt
salt
pepper
Directions
Preheat oven to 425 degrees. Line a baking sheet with foil and top with a wire cooling rack. Spray the rack with non-stick spray.
Assemble 2 shallow bowls and one large ziplock bag.
Mix together the season salt, pepper and flour in the ziplock bag.
In the 2nd bowl, whisk the eggs and milk together.
In the 3rd bowl, combine the panko and Parmsean cheese. Season the zucchini sticks with a light sprinkling of salt and pepper.
Add a quarter of the zucchini sticks to the flour mixture and shake to completely coat with flour. Remove the zucchini sticks from the bag and dip them, one by one, in the egg mixture, followed by rolling in the panko until coated.
Place on the cooling rack, side by side, and repeat until all of the zucchini sticks are coated and breaded.
Bake for 20 minutes until golden. Serve with ketchup or marinara sauce.
Friday, April 16, 2010
Lime Marinated Flank Steak

As I was flipping through my copy of Martha Stewart's Great Food Fast, I noticed that a lot of her recipes are chicken or pasta. That is usually right up my alley, but the husband gets tired of poultry long before I do, so when I flipped the page to this flank steak recipe I immediately showed it to the husband and asked if he wanted to try it. Since this was right around the time we'd been eating nothing but chicken for several days, and I rarely buy red meat, he jumped at the chance to add this to the week's menu.
I am really glad we gave this one a try. The lime juice paired so well with the soy sauce and ginger, with none overwhelming the other. I wanted to make burritos out of the steak, but was hesitant at first since it was marinated in soy sauce--I went ahead with my plan and they turned out fabulously! We spread extremely ripe mashed avocado on tortillas, topped with the sliced steak, some sliced green onions, and a drizzle of crema-perfection. I ate the leftovers for lunch the next day and it was just as good as the night before.
I think this would make a great weeknight meal because you only have to marinate the meat for 30 minutes; heat the grill right after making the marinade and it will be ready to go as soon as the meat is!
Lime Marinated Flank Steak
Source: Great Food Fast
Printable Recipe
Ingredients
1 1/2 pounds flank steak
1/2 cup lime juice (about 4-5 limes)
2 Tablespoons soy sauce
2 green onions, thinly sliced
2 Tablespoons fresh ginger, minced
1/2 teaspoon crushed red pepper flakes
1/2 teaspoon cayenne
salt and pepper
vegetable oil for grill grates
Directions
Combine all ingredients, except for the vegetable oil, in a large ziplock bag. Marinate for 30 minutes, turning occasionally.
Prepare a charcoal grill. Once the coals are hot, rub a paper towel with vegetable oil on the grates, using tongs.
Cook the steak on the grill (throw away the marinade), with the lid on, until your desired doneness (160 degrees for medium well, about 8-10 minutes).
Remove meat from the grill and let rest for 5-10 minutes to allow the meat to reabsorb the juices. Slice across the grain in thin slices.
Thursday, April 15, 2010
Strawberry, Banana, Blueberry Muffins

My cousin and his wife recently had a baby, who I couldn't wait to meet. In a nice twist of fate, my first day of spring break also happened to be the same day of their 2nd wedding anniversary, so they asked me not only to come visit, but to babysit for a few hours while they went out to dinner. Initially I was a bit nervous...I haven't babysat since high school and I haven't spent anytime taking care of a 4 week old baby alone. But I love babies, I was excited to see my newest relative, and I wanted the new parents to be able to enjoy their anniversary, so of course I agreed.
Before I got in the car for my trip down to San Diego, I baked up a batch of these muffins to take with me. I love baking for friends, and with new parents usually exhausted from caring for their baby, I figured they would enjoy not having to worry about making breakfast for awhile. My cousin ate one the moment he walked in the door from work, so I'm pretty confident these were a welcome treat!
The husband was a bit sad that I only left him one muffin (not that he can complain too much, since he ate all of the leftover strawberries and cream cake while I was gone!), so I baked up another batch for the two of us to enjoy. I bet these would be great with some whipped honey butter smeared inside!

Strawberry, Banana, Blueberry Muffins
Source: Adapted from this recipe, originally from Vintage Victuals
Printable Recipe
Ingredients
1 1/2 cups unbleached whole wheat flour
1 cup oats, rolled or quick
1/4 cup brown sugar, packed
1/4 cup sugar
2 teaspoons baking powder
1 teaspoon baking soda
1/2 teaspoon salt
1 teaspoon cinnamon
1 teaspoon ground flax seeds, optional
1 teaspoon ground flax seeds, optional
2 eggs
1/4 cup apple sauce
1/4 cup fat free sour cream or crema
1 mashed ripe bananas
1 1/2 cups blueberries, fresh or frozen2 cups strawberries, fresh or frozen, sliced
Directions
Pre-heat your oven to 400 degrees. Spray muffin tins with non-stick spray, or line them with paper liners.
Mix the dry ingredients together in a large bowl. Set aside.
In a small bowl, mix the eggs, apple sauce, sour cream, and fruit (except for the blueberries) together.
Pour into the dry ingredients and mix with a spatula until just combined. Gently fold in the blueberries.
Fill each muffin tin about 2/3 full and bake for 17 minutes, or until a toothpick inserted in the center comes out clean.
Wednesday, April 14, 2010
Strawberry Sorbet

I actually made this sorbet before I made the kiwi sorbet--well like one day before. Strawberries were on sale for less than a $1 a pound, so I quickly scooped up 5 pounds, knowing I wanted to make the strawberries and cream cake and this sorbet.
Just like the kiwi sorbet, this was refreshing and it tasted like fresh sweet strawberries here. Be sure to use ripe strawberries or the flavor won't be as pronounced.

Strawberry Sorbet
Source: inspired by Deliciously Organic
Printable Recipe
Ingredients
2 cups sliced strawberries
1/3 cup orange honey (you can use regular honey)
3/4 cup water
juice of one lime
1/4 cup strawberry syrup (the liquid from tossing sliced strawberries in sugar)
Directions
Heat the water and honey in a saucepan, just until the honey melts.
Combine all ingredients in a blender and puree until smooth.
Chill in the freezer for 15 minutes and then freezer in your ice cream maker.
Tuesday, April 13, 2010
Homemade Chicken Gravy
I made this gravy on Easter, using the pan juices from the roasted chicken. I knew I wanted to make gravy since we were having chicken and mashed potatoes, and after making gravy from scratch on Thanksgiving, I knew I could do it again. I didn't use a recipe here, I just added flour and water until it was the right consistency. The pan juices make the gravy really flavorful, unlike that packaged, powdered junk. Definitely give this a try the next time you roast a chicken!
Homemade Chicken Gravy
Printable Recipe
Ingredients
Pan juices from roasted chicken
2-3 tablespoons flour
2-3 cups water
salt and pepper to taste
Directions
Place the roasting pan on the stovetop, with the flame on medium high. Add the flour and mix into the pan juices. Add the water and whisk to combine, allowing the sauce to thicken.
Season the gravy with salt and pepper and pour into a serving dish.
Enjoy over roasted chicken, mashed potatoes, or whatever else you like smothered in gravy!
Monday, April 12, 2010
Spaghetti and Meatballs
 I recently tried a recipe for spaghetti and meatballs, where the meatballs were simmered in the sauce. It was from a source I normally trust, and it sounded good, but I thought the meatballs were horrible! They had a really mushy texture from simmering in the sauce, which I couldn't stomach.
I wanted to make spaghetti and meatballs again, as the husband has requested it several times recently, so I did some Internet digging and found a recipe from Alton Brown that incorporated spinach into the meatballs and then bakes them in the oven. I decided to riff off his recipe, switching out grated zucchini for the spinach and changing the seasonings to use what I had on hand.
These meatballs were infinitesimally better than the other recipe I tried! I simmered a semi-homemade tomato sauce to top the noodles and made some quick garlic bread to go with the meal and both the husband and I were happy.
Spaghetti and Meatballs
Source: meatballs inspired by Alton Brown
Printable Recipe
Meatball Ingredients
1 pound ground turkey
1/2 a zucchini, peeled and grated
2 tablespoons dried basil
1 tablespoon dried thyme
2 teaspoons garlic salt
1 Tablespoon pepper
1/4 teaspoon cayenne
1/4 teaspoon crushed red pepper
1/4 cup panko + 3/4 cup additional
1 egg
Tomato Sauce Ingredients
(double this if you like a lot of sauce or there are more than 2 people)
1 can stewed Italian tomatoes
1 small can tomato paste
1 Tablespoon dried basil
1/4 teaspoon crushed red pepper
1/2 teaspoon garlic salt
2 teaspoons pepper
1 tablespoon grated Parmesan cheese
Directions
Pre-heat the oven to 400 degrees. Put a pot of water on to boil for the noodles.
Spray a baking sheet with non-stick spray and set aside.
Combine the turkey, zucchini, seasonings and egg in a medium bowl and mix to combine. Add the 1/4 cup panko and mix into the meat mixture.
Pour the 3/4 panko into a small bowl.
Form the meat into meatballs and roll each meatball into the panko. Set the meatballs on the baking sheet and bake for 20 minutes.
While the meatballs bake, combine the stewed tomatoes, the tomato paste, cheese, and seasonings in a small saucepan and simmer. You can add some water to make a thinner sauce if you like.
Cook the spaghetti noodles according to the directions on the package. Drain the water from the cooked noodles.
Layer the noodles, sauce and meatballs and enjoy!
Friday, April 9, 2010
Kiwi Sorbet

I love having a Costco membership; I think we save a lot of money buying our toilet paper, paper towels, and laundry detergent in bulk. Their baby back ribs are a great price and we always run in for movie tickets before heading out to the theater. But other times, I think buying bulk is not so great. I mean there are only two of us and we can't eat ALL that food, but I hate when things go to waste.
Case in point: the 5 pounds of kiwi I recently bought. The husband loves kiwi, so last time I was at Costco I picked up a container of the fruit for him. He ate a few, but the majority of the kiwis were still sitting on the counter 2 weeks later. Luckily I stumbled upon this recipe, which I immediately bookmarked to use up all those kiwi.
The sorbet is really refreshing and fruity. It tasted kind of tart right after I churned it, but after the hard freeze in the freezer it was sweet and kiwilicious!
Check back soon for my variation using fresh strawberries. Yum!
Kiwi Sorbet
Source: Deliciously Organic
Printable Recipe
Ingredients
2 cups kiwi, peeled and chopped (about 8-10 kiwis)
1/3 cup orange honey (you can use regular honey)
3/4 cup water
juice of half a lemon
Directions
Heat the honey and water in a saucepan, just until the honey melts.
Combine all of the ingredients in a blender and puree until smooth.
Chill the mixture in the freezer for 15 minutes. Freeze in your ice cream maker according to manufacturer's directions.
Thursday, April 8, 2010
Strawberries and Cream Cake

So what did you do for Easter this year? The husband isn't Christian and I am not very religious, so we don't really have any Easter traditions--we just kind of go with the flow each year and do whatever sounds good in the moment.
This year we invited my friend and former college roommate, Cherice, along with her fiance, Kavin, over for dinner. We had a blast; while the guys drank beer and played video games, I had Cherice help me out in the kitchen, roasting chicken and a variety of veggies, mashing potatoes, and making gravy from scratch. To top off a great dinner, I served chocolate mousse and this strawberries and cream cake...with homemade whipped cream!
I think this cake might become our new Easter tradition.

Strawberries and Cream Cake
Source: The Busty Baker
Printable Recipe
Cake Ingredients
½ cup (1 stick) unsalted butter, room temperature, plus more for pan
1 ½ cups all purpose flour, plus more for pan
2 teaspoons baking powder
½ teaspoon salt
½ cup sugar
2 large eggs, plus 2 large egg yolks
½ teaspoon pure vanilla extract
½ cup milk
Strawberries and Cream Ingredients
1 pound strawberries, hulled and thinly sliced, divided
½ cup sugar, divided
1 teaspoon unflavored gelatin (one ¼-oz envelope)
2 cups (1 pint) heavy cream
1 teaspoon vanilla extract
Directions
Preheat oven to 350F.
Butter an 8-inch round pan, and line the bottom with parchment. Butter and flour parchment and sides.
In medium bowl, sift together flour, baking powder, and salt; set aside.
Cream together butter and sugar in an electric mixer until light and fluffy, about 3 minutes. Add eggs and yolks, one at a time, beating until combined after each addition. Beat in vanilla. With mixer on low, add flour mixture and milk alternately, beginning and ending with flour. Mix until just combined.
Pour batter into prepared pan and smooth top.
Bake until a toothpick inserted in the centers comes out clean, about 25 to 30 minutes. Cool for pan 10 minutes in the pan, then invert onto a wire rack to cool completely.
When cake has cooled, make the strawberries and cream:
In a large bowl, combine half of the strawberries and ¼ cup of sugar; set aside.
Pour 2 tablespoons of cold water in a small saucepan. Sprinkle gelatin over water; let soften for 5 minutes.
Heat saucepan over low heat, stirring constantly, until gelatin has dissolved. Remove from heat and let cool slightly. (It will congeal when cooled completely, but you can dissolve it again by returning it to the heat and stirring.)
In the clean bowl of an electric mixer, fitted with the whisk attachment, beat heavy cream, vanilla extract, and remaining ¼ cup sugar until very soft peaks form.
With mixer still running, gradually add gelatin mixture; beat until soft peaks form.
Assemble the cake:
Using a serrated knife, split the cake in half horizontally.
Place the bottom half, cut side up on a serving plate. Arrange the strawberry/sugar mixture over the bottom cake layer, drizzling any juices in the bowl over top the strawberries. Don't be shy with the juices!
Top with half of the whipped cream, leaving a 1 inch border.
Cover with top half of cake. Top with remaining whipped cream.
Refrigerate cake and remaining strawberries separately, at least 1 hour, up to 1 day. Just before serving, arrange remaining strawberries on top of cake.
Wednesday, April 7, 2010
Almond Poppyseed Bundt Cake

Isn't it funny how sometimes time seems to fly and other times it drags on? And at yet another time it seems to do both? That's how I feel about this school year...some days and weeks just seem to drag on for.ev.er. Others fly by and I can't believe how quickly Monday turns into Friday.
It seems like we started the count down to Spring Break right after Winter Break this year. I remember February winding to a close, and the prospect of the 5 weeks of March, with no scheduled days off, looming large and long in front of us, the only salvation being Spring Break coming right as April entered. The daily Spring Break count down in the teacher's lounge, mocked me as we ate and chatted everyday. Time seemed to slow down and linger in March, taunting me as I looked forward to a week off.
Now I'm right in the middle of Spring Break, and it feels like those long, slow moments of March were a lifetime ago. I can't believe it's *already* April and I am enjoying my days of relaxation at home. Of course, too soon it will be time to go back to work and this break will be just another distant memory. But for now I am enjoying a nice perk of teaching-the breaks!
To celebrate spring and the arrival of break, we had a staff potluck Wednesday before break. When the sign up list came around, I wasn't sure what I wanted to make, beyond knowing I definitely wanted to bake a dessert. Then Joy the Baker posted a poppyseed bundt cake, answering that question for me. I added some almond extract and dusted my finished cake with powdered sugar instead of her blueberry glaze...perfection.

Almond Poppyseed Bundt Cake
Source: Adapted from Joy the Baker
Printable Recipe
Ingredients
2 1/2 cups all purpose flour
1 1/1 cups sugar
1 teaspoon baking soda
1 teaspoon salt
1/3 cup canola oil
1 cup buttermilk
2 large eggs
1 teaspoon white vinegar (I was out, so I used apple cider vinegar, which worked perfectly)
1 teaspoon vanilla extract
1 1/2 teaspoons almond extract
2 Tablespoons poppy seeds
Powdered Sugar
Directions
Preheat the oven to 325 degrees. Grease and flour a 10" bundt cake pan and set aside.
In a medium bowl, whisk together the flour, sugar, baking soda and salt. In another medium bowl, whisk together canola oil, buttermilk, egg, vinegar, almond extract and vanilla extract. Add the wet ingredients to the dry ingredients all at once. Whisk together until just combined and no lumps remain. Stir in the poppy seeds.
Pour the batter into the prepared baking pan and bake for 35-45 minutes, or until a toothpick inserted in the center of the cake comes out clean.
Allow the cake to cool in the pan for 20 minutes. Carefully run a butter knife along the edges of the cake to assure that it is loosened enough before inverting the cake onto a wire rack to cool.
Pour about 2 Tablespoons of powdered sugar into a mesh strainer and sprinkle over the top of the cake.

Tuesday, April 6, 2010
Indian-Spiced Burgers

After serving chicken for multiple nights in a row, the husband was longing for something else to eat. When I told him we'd be having roasted chicken for Easter dinner, he sighed and asked if we could please have something different in the two nights left before Easter. Wanting to please, I flipped through the numerous recipes I tagged in my copy of Great Food Fast, looking for something new--and not chicken--to make for dinner. Unfortunately, most of the recipes I really wanted to try featured chicken, of course.
But then I came across a recipe for Indian-Spiced Chicken Burgers. The husband and I are both big fans of making turkey burgers, and I am always looking for new flavors, so I decided to go with this recipe, subbing in ground turkey for the chicken.
I am so glad we gave these burgers a try! I normally don't care much for cumin, but combined with all of the other spices here, it made for a delicious new burger combo. The cayenne definitely spiced things up too; I was really glad I made the cumin yogurt sauce to help cut the heat! But, to be honest, I think I accidentally used 1/2 a teaspoon of cayenne, instead of the 1/4 teaspoon called for in the recipe.
The husband, who despite being Pakistani, is not normally a fan of spicy or Indian food, *loved* these burgers and commented that I should make them twice a month. That was more specific than "add them to the rotation", so he must have really loved them!
Indian-Spiced Burgers with Cumin Yogurt Sauce
Source: adapted from Martha Stewart's Great Food Fast
Printable Recipe
Ingredients
1 1/2 pounds ground turkey or chicken
4 green onions, thinly sliced
3 Tablespoons chopped fresh ginger
2 Tablespoons fresh lemon juice
1 Tablespoon paprika
2 teaspoons ground cumin
1/2 teaspoon ground cardamom
1/4 teaspoon cayenne pepper
1 1/2 teaspoons coarse salt (I used regular table salt)
1 teaspoon pepper
1/2 a cucumber, peeled and thinly sliced
whole wheat pitas
Directions
Prepare your grill for medium-high heat.
In a medium bowl, combine the ground turkey, green onions, ginger, lemon juice, paprika, cumin, cardamom, cayenne, salt and pepper. Mix well to combine. Set aside to marinate for 10-30 minutes.
Form the meat into 3/4" thick patties, about 3 Tablespoons of meat per patty. Sprinkle with additional pepper.
Pour about a tablespoon or two of vegetable oil on a folded paper towel. Using a pair of tongs, rub the oiled towel on the grates of the grill to prevent meat from sticking.
Grill the patties until cooked through (165 degrees internal temperature), about 3-4 minutes per side. About 2 minutes before the meat is done, heat the pitas on the grill as well.
Slice the pitas in half and place a cucumber slice and two patties inside. Drizzle with cumin yogurt sauce.
Cumin Yogurt Sauce
Ingredients
1 container (about 3/4 of a cup) low-fat plain yogurt
1/2 teaspoon ground cumin
dash paprika
salt and pepper to taste
Directions
Combine all ingredients in a small bowl and stir to combine. Refrigerate until ready to serve with Indian-spiced burgers.
Monday, April 5, 2010
Chicken and Veggie Stir Fry

This was another one of those "end of the month, end of the money" meals. Rather than go to the grocery store to pick up random ingredients for a dish, I pawed through the freezer, pulling out what we already had on hand. When I found a package of chicken thighs and assorted frozen veggies, I knew a stir fry would be the perfect meal.
Though the ingredient list is long, this meal comes together quickly and easily. The marinade is pretty simple, but adds a ton of flavor to the chicken. I squirted a bit of sriracha sauce on my plate (after photographing it) for a bit more heat, but you can also up the chili paste in the stir fry itself if you want.
Chicken and Veggie Stir Fry
Source: A Cooking in Cucamonga Original
Printable Recipe
Ingredients
5 small boneless, skinless chicken thighs
3 Tablespoons cornstarch
1 Tablespoon rice vinegar
1 Tablespoon low sodium soy sauce
2 Tablespoons sesame oil, divided
1/2 teaspoon ground ginger
1/4 teaspoon garlic powder
1/2 teaspoon pepper
2 Tablespoons vegetable oil
1/2 teaspoon garlic salt
1 cup sliced bell peppers (I used a bag of frozen multi-colored peppers)
1 cup corn kernels
1 can bamboo shoots, drained
1 can water chestnuts, drained
1 cup water + 1 teaspoon chicken or vegetable bullion
additional pepper to taste
1 dash/smidge of chili paste, add more or less depending on how much heat you like (mine was not spicy at all, so add more like a 1/2 teaspoon if you want spicy)
Directions
Cut up the chicken thighs into small chunks and put into a ziplock bag. Add the cornstarch and shake, ensuring that all chicken pieces are coated. Add the rice vinegar, soy sauce, 1 tablespoon sesame oil, ground ginger, garlic powder, and pepper. Shake to coat and let marinate 10-30 minutes.
Heat the vegetable oil in a large wok until hot. Add the chicken and cook about 4 minutes, until chicken in no longer pink.
Remove chicken from the wok and set aside.
Heat the remaining 1 Tablespoon sesame oil in the wok. Once it is hot, add all of the vegetables, sprinkle with garlic salt and add the dash of chili paste . Stir fry until heated through and crisp. Add the chicken back to the wok, pour in the water with bullion. Cook for another 3-4 minutes, or until the sauce has thickened.
Serve over rice.
Friday, April 2, 2010
Chocolate Ice Cream Topping

I love ice cream. Who doesn't? And sometimes when I am enjoying a bowl of creamy delicious ice cream at home, I want some hot fudge to go with it. However, I am not willing to buy it from the store...it's too expensive and that Magic Shell stuff weirds me out....what makes it firm up like that?? That can't be natural.
So, when I am in the mood for some hot fudge goodness, I whip up this quick sauce, which my mom taught me to make back in middle school. I've recently introduced my husband to my homemade hot fudge and it's quickly become his favorite as well, though he prefers his without the peanut butter.
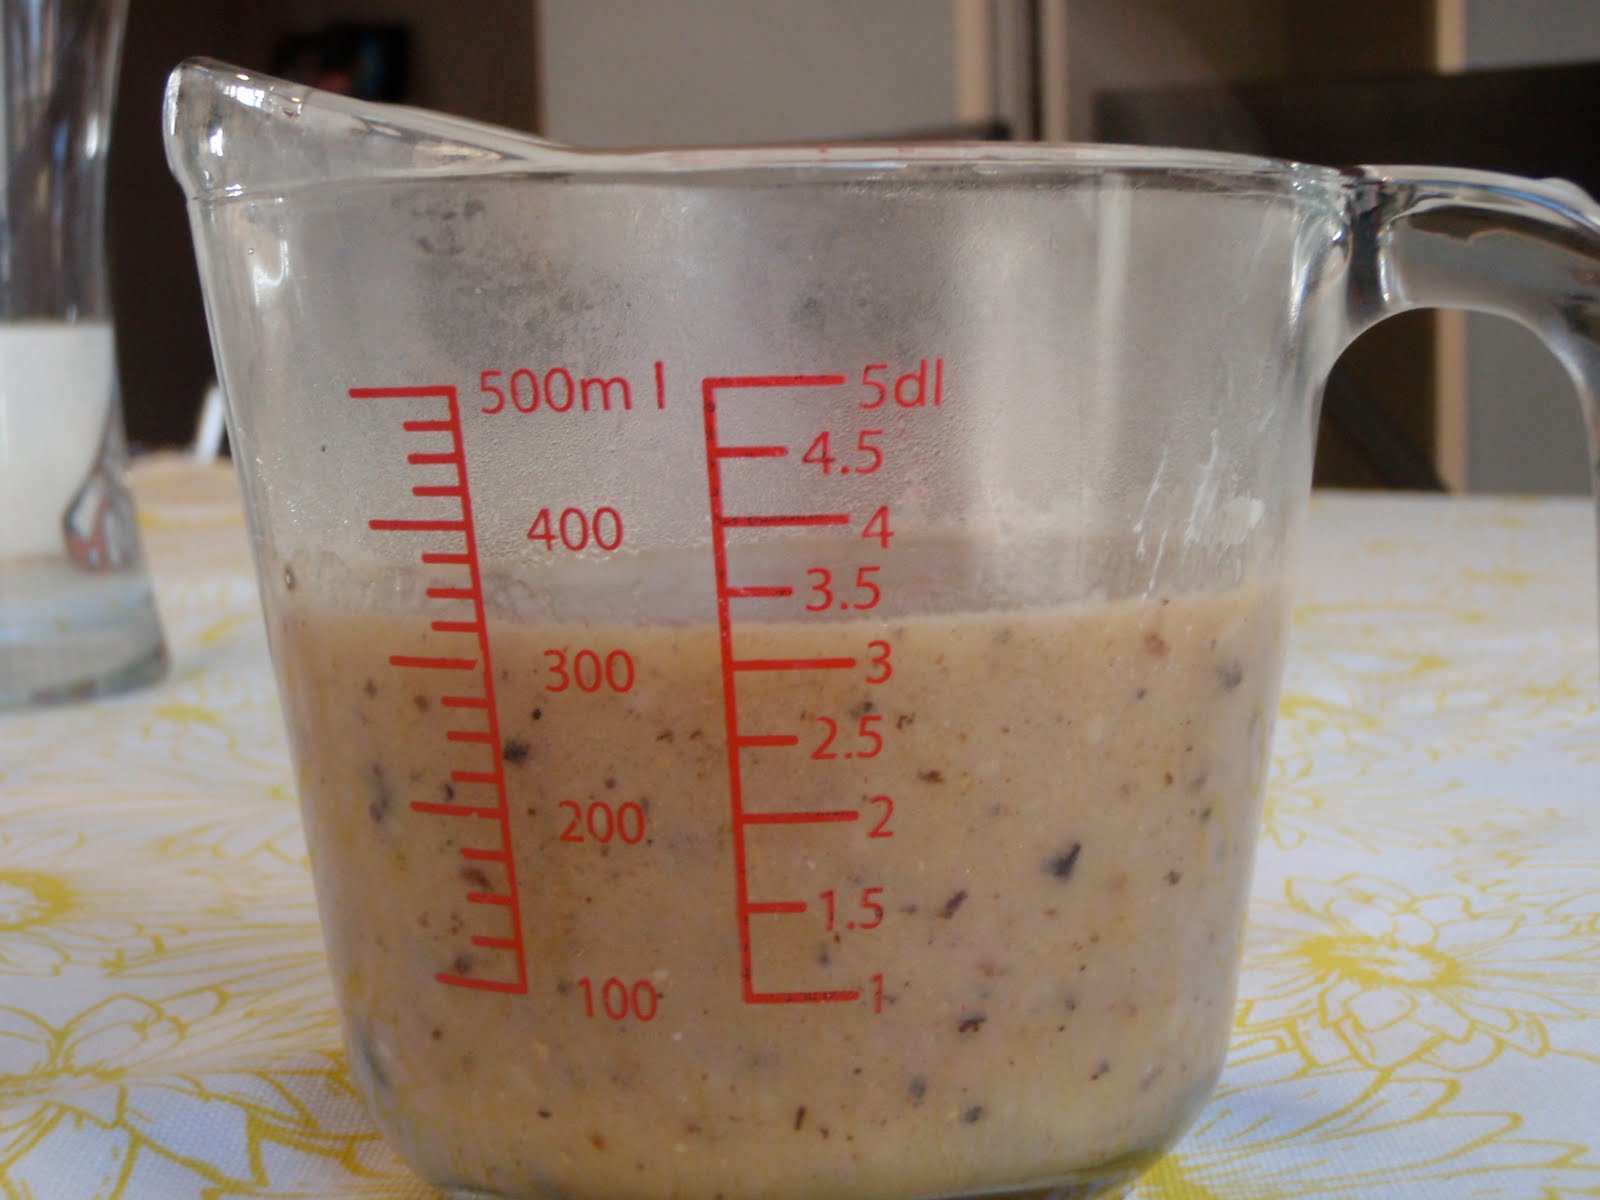
The following recipe is enough for 2 small bowls of ice cream.
Note: these pictures were taken at night when there was no natural light, hence the yellow hue from my kitchen lighting.
Chocolate Ice Cream Topping
Source: A Cooking in Cucamonga Original
Printable Recipe
Ingredients
3 ounces chocolate chips
2-3 tablespoons milk (add more or less depending on how thick you want your topping)
1/2 to 1 Tablespoon smooth peanut butter
Directions
Put all ingredients in a microwave safe-bowl and microwave for 30 second increments. Stir after each 30 second spin in the microwave. Continue until the chocolate is melted and the mix is smooth.

If your topping is too liquidy, add a little more chocolate chips and microwave again until melted.
Thursday, April 1, 2010
Chicken Tacos

I made these tacos using leftover meat from my oven-roasted chicken. This was a great way to use up some leftovers, without having the same meal twice! Not only that, but this also brought the cost of the chicken down to pennies per meal (we got 3 meals each out of one bird!)--always a bonus when you're trying to save money.
Chicken Tacos
Source: A Cooking in Cucamonga Original
Printable Recipe
Ingredients
corn tortillas
leftover roasted chicken, shredded
crema or sour cream
chunky salsa
shredded cheese
green onions, diced
Directions
Heat the tortillas in the microwave for about 30 seconds, or until they are soft. Heat the chicken for a minute or so, until heated through.
Pile the chicken into the tortillas and drizzle with crema, salsa, diced green onions and the shredded cheese.
Subscribe to:
Comments (Atom)