Thursday, December 31, 2009

Champagne Chicken

Wow, January 1st, 2010. It's the beginning of not just a new year, but a new decade. So much has happened in the last 10 years... including living in London, moving to San Francisco, graduating from college, surviving several crappy jobs and a company folding, my grandma's death, my car being stolen, returning to college to earn a teaching credential, surviving a horrible first year teaching, meeting my husband and getting married, and buying our first home. I can't wait to see what the next 10 years has in store for me...hopefully children are in the near future!

New Year's Eve also holds a special meaning for my husband and I....we met on December 31st, 2004, shortly before midnight and began dating less than a week later. This NYE marked 5 years since we met each other, so I wanted to prepare an extra special dinner for the two of us.

Make sure you buy a decent bottle of champagne for this dish as it adds a ton of flavor to the sauce. Don't go bottom shelf, but you don't need to splurge on the Moet or Cristal here; I used a bottle of Barefoot Bubbly Brut. Also, since this is a savory dish, leave the Asti and Rose for drinking--you want a Brut or a similar dry champagne for this dish. Lastly, this dish makes a ton of rich, creamy sauce; serve everyone a chunk of bread to soak it all up. I served mine with homemade foccicia.


Champagne Chicken
Source: The Rookie Chef
Printable Recipe


Ingredients
3 boneless, skinless chicken breasts (I used 5 small boneless, skinless thighs)
1/3 cup flour
1 teaspoon salt
1 teaspoon pepper
1/4 cup butter
2 teaspoons olive oil
1 1/2 cups champagne
1 cup whipping cream
1 teaspoon ground dried rosemary (I used about 2-3 teaspoons whole dried rosemary)

Directions

Melt the butter with the olive oil in a large saucepan over medium heat.

Mix the flour, salt, and pepper together in a large bowl. Dredge the chicken in the flour mixture.

Saute the chicken for 5 minutes. Turn over and add the champagne. Cook for another 12-15 minutes (if you're using thighs instead of breasts, they'll cook in less time...8-10 minutes).

Add the cream and rosemary and gently stir the sauce to combine. Cook until the sauce is thickened (if the chicken is done before this point, remove and set on a serving platter, while the sauce finishes).

Plate the chicken and spoon the sauce over the top. Serve with a hunk of bread to sop up the extra sauce and enjoy!

Tuesday, December 29, 2009

Steak Topped with Caramelized Mushrooms, Shallots, and Garlic, Served with Baked Potatos


The husband loves steak, but I rarely buy it. I must have been feeling generous the last time I went grocery shopping; I picked up two organic, free-range, grass fed steaks. Yeah seriously, that is some expensive beef. At least I can feel good about the hippy-ness of its life though and know that the cow did not eat other cows for dinner.

As I was prepping the steaks, I decided I wanted them to be kind of fancy, so I grabbed a bunch of shallots, garlic and mushrooms to caramelize for a topping. Ohhhhhh, the smell was intoxicating! I wanted to spoon the mushroom mix straight from the pan to my mouth. Instead, I waited until the husband got home and topped my steak, as well as my potato with the goodness.

Make this...soon. You won't be sorry. Well, unless you are trying to stick to a diet.


Mushroom-topped Steak with Baked Potatos
Source: me
Printable Recipe


Ingredients
2 small steaks (whatever cut you like.)
2 baking potatos
8 ounces crimini mushrooms
4 large garlic cloves
5 shallots
1 tablespoon olive oil
1 tablespoon butter
salt
pepper
chili powder (optional)
baked potato toppings (we had butter, shredded cheese, bacon bits, and sour cream)

Directions

Prepare your charcoal grill with coals on only one side of the grill.

Salt and pepper the steaks. Add a dash of chili powder as well, if you like a bit of heat.

Heat the oil and butter in a large pan over medium heat.

Roughly chop the mushrooms, shallots and garlic. Add them to the butter and oil, and cook on medium-low for 20 minutes, until caramelized.

Scrub the potatos clean and pierce with a fork in several places. Cook in the microwave for 10 minutes.

Once the grill is hot, cook the steaks over indirect heat (the side without the charcoal). Cook for 6-10 minutes (depending on how done you like your steaks), and then move to direct heat for one minute to get the nice char on the outside.

Let the steaks sit for 5-10 minutes to rest and reabsorb the juices.

While the steaks are resting, place the potatos over the hot coals for 2-3 minutes to char the skin a bit.

Plate the steaks, spoon the mushroom mixture on the top, and serve with the baked potatos.

Saturday, December 26, 2009

Chili Lime Salmon


This is a quick, easy, and healthy dinner that can easily be made on a hectic weeknight. The chili powder adds a hint of heat without being overwhelming, while the lime juice adds a nice citrusy twist. I normally douse my salmon in salsa to cover up the taste of the fish, but this time I left the salsa in the fridge and enjoyed the slight heat of the seasonings. I served the salmon with some cous cous cooked in turkey stock.

Chili Lime Salmon

Printable Recipe
Source: Me

Ingredients
1 salmon fillet
pepper
chili powder
1 lime

Directions
Place the salmon skin-side down on a plate and pat the salmon dry.

Generously coat with pepper and chili pepper. Gently rub the seasoning into the flesh. Squeeze the juice of half a lime over the fish.

Grill skin-side down for 4 minutes, with the BBQ lid on. Flip the fish over and grill for an additional 3-4 minutes.

Squeeze the juice of the remaining lime half over the flesh side of the fish and serve immediately.

Thursday, December 24, 2009

Guinness Ice Cream


Google Books is my new favorite internet resource. Just type in the name of a book and an online edition pops up. Now, I don't believe entire editions are available online, but in the case of cookbooks, that's ok. It's a great way to sample recipes from a new cookbook without having to buy it or hope that the local library has a copy in stock.

I've been hearing great things about David Lebovitz's ice cream book The Perfect Scoop. After seeing several bloggers rely on his recipes I looked his book up on Google Books, and found a plethora of recipes available to sample for free. There are way too many appetizing options to choose from in the 45 pages available online, but I quickly decided to try the Guinness Milk Chocolate ice cream. The husband loves Guinness draught beers, and enjoys a bottle or two during Sunday afternoon football, so this was an easy choice for me.

This is made in the French style with an egg custard base. Be sure to give yourself two days to make this ice cream. The custard base needs to be cooked in advance and then chilled for a minimum of 8 hours, but overnight works best, especially since this recipe contains alcohol. The finished product will be very soft and melty; the alcohol content prevents it from freezing hard.

I can't wait to try more of David Lebovitz's ice cream recipes and I will be buying this book in the near future!

The finished result is very chocolate-y, with a rich, full-bodied taste from the beer. Not as pronounced a beer flavor as I expected, but I think using the extra stout will change that.

Guinness Milk Chocolate Ice Cream
Source: The Perfect Scoop
Printable Recipe

Ingredients
7 ounces milk chocolate, finely chopped
1 cup whole milk
1/2 cup sugar
pinch of salt
4 large egg yolks
1 cup heavy cream
3/4 cup Guinness Stout (I used the draught, but you can also use the extra stout.)
1 teaspoon vanilla extract

Directions
Place the chopped chocolate in a large bowl and set a mesh strainer over the top.

Warm the milk, sugar, and chocolate in a large saucepan on the stove top. In a separate medium bowl, whisk the egg yolks together. Once the milk is warmed through (do not let it come to a boil), slowly pour it into the egg yolks, whisking constantly. (I find it is best to dribble a small amount of the milk into the egg yolks and whisk to temper the eggs before adding the entire amount.)

Pour the egg and milk mixture back into the saucepan and cook, stirring constantly, until the mixture is thickened. Again, don't let it come to a boil.

Pour the custard into the strainer set over the chocolate. Stir the mixture until the chocolate is completely melted. Pour in the heavy cream and whisk until completely smooth. Pour in the Guinness and vanilla and stir to combine.

Stir until cool over and ice bath until completely cool. Cover the bowl and chill in the fridge overnight. Meanwhile, enjoy the rest of your beer!

The next day, freeze the mixture in your ice cream maker according to manufacture directions. I use a Kitchen Aid stand mixer fitter with an ice cream attachment. It is important to turn the machine on before pouring the cream into the bowl, otherwise the mixture may freeze to the sides, preventing the dasher from churning.

Wednesday, December 23, 2009

Lemon Clove Cookies


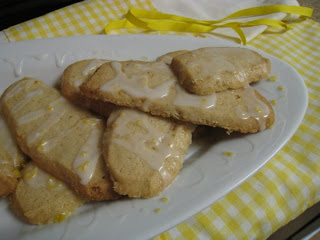
No doubt, at this time of year, the palate is in chocolate, eggnog, peppermint overdrive. Every dessert is some rich, creamy, decadent delight, or a frosted Christmas cookie. I myself am guilty of this, having made 4 batches of peppermint bark in less than 2 weeks. My husband is dying for a non-pepperminty treat.

That's where these sunshiney treats step in. Their bright citrusy flavor is a refreshing palate cleanser from those rich Christmas treats. The lemon flavor shines through without becoming too tart or cloying, while the cloves add depthness of flavor to round out the crunchy cookie. It's like taking a bite of summer.

Too bad I forgot the husband isn't a fan of lemon. Oh well, more for me.

Oh, just as a side note. If you need to buy cloves just for this recipe, don't buy the jarred cloves in the spice aisle. Walk yourself over to the Hispanic aisle, find the spices in little bags, and pick up a small bag of ground cloves for less than a buck. The jarred stuff will set you back about $8 or more.

You're welcome.

Oh, one last note. If it weren't for my friend Michelle zesting half a lemon, licking the batter, and expertly drizzling the icing, these cookies may never have come to existence. ;)

Lemon Clove Cookies
Source: Adapted from
McCormicks, and my friend Tiffany
Printable Recipe


Ingredients
2 cups flour
1/4 teaspoon ground cloves
1/8 teaspoon salt
3/4 cup butter (1 and a half sticks), softened
1 cup sugar
1 egg
1 teaspoon lemon extract
zest of one lemon

Icing
1 1/2 cups powdered sugar
2 tablespoons plus 2 teaspoons fresh lemon juice
1/4 teaspoon lemon extract
zest of one lemon

Directions
Mix flour, cloves and salt in medium bowl; set aside.

Beat butter and granulated sugar in large bowl with electric mixer on medium speed until light and fluffy. Add egg, lemon zest and lemon extract; beat until well blended. Gradually beat in flour mixture until well mixed.

Divide dough in half. Form each half into a log about 1 1/2 inches in diameter and 9 inches long. Wrap in wax paper. (I totally ignored these directions and made one large rectangle, so my cookies came out more oblong than round.)

Refrigerate 1 hour or until firm.

Preheat oven to 350°F.

Cut dough into 1/4-inch thick slices. Place on ungreased baking sheets.

Bake 12 to 15 minutes or until lightly browned. Cool on baking sheets 1 minute. Remove to wire racks; cool completely.

For the Lemon Glaze, mix powdered sugar, lemon juice, lemon zest, and lemon extract in small bowl until well blended. Drizzle over cooled cookies. Let stand until glaze is set.

Tuesday, December 22, 2009

Cold Soba Noodle Salad


One benefit of being a teacher is the much-needed vacation time. I love teaching my students every day, but I find myself needing a break from them right around the time our school vacations are set to begin. This year was no different; in the week or so before December 20, I found myself counting down the days until we were on Christmas Break. The minutes slowly ticked by on December 18, the last day of school before a two week break. Now I am on my second official day of Winter Break and enjoying the relaxation time.

Since I am home, I've decided to cook a real lunch for my husband and I everyday and branch out and try some new foods. While I was flipping through my huge hardback Cooking Light compilation cookbook, I found this recipe for soba noodles with tofu. The husband is a huge fan of tofu and I am always looking for new ways to use it, so I decided to give this a try.

Even though I used low-sodium soy sauce, I did find this to be a tad salty, so I might reduce the amount of soy sauce next time. Also, I plan to half the amount of cucumbers and double the tofu. Some grilled ginger chicken might also be a nice addition. However, I have printed the original recipe from Cooking Light below. Let me know what you think and if you make any substitutions. :)

Cold Soba Noodle Salad
Source: Cooking Light
Printable Recipe


Ingredients
1/3 cup low-sodium soy sauce
2 Tablespoons rice vinegar
1 Tablespoon minced peeled fresh ginger
1 teaspoon sugar
1 1/2 teaspoons dark sesame oil
1/2 teaspoon chili oil or vegetable oil (I used vegetable oil, but I just found chili oil at Fresh and Easy recently)
1 1/2 teaspoons sesame seeds
4 cups cooked soba noodles (8 ounces uncooked noodles)
2 cups sliced peeled cucumber (1 whole cucumber)
1 cup thinly sliced green onions
2 cups cubed firm tofu, about 12 ounces (I used medium firm...be sure to squeeze out all of the water before adding to the salad)

Directions
Combine the first 6 ingredients in a small bowl, whisk together, and set aside.

Cook the sesame seeds in a small saucepan over medium heat until toasted, about one minute.

Combine sesame seeds, noodles, cucumber slices, noodles, and onions in a large bowl. Toss gently.

Pour the dressing over the top of the salad and toss once again.

Chill in the refrigerator for 30 minutes before serving.

Boozy Peach Melba Trifle


I absolutely love Christmas parties. Work parties, friend parties, family parties; the more Christmas parties the better, in my opinion.
My husband's company Christmas party was a pot luck celebration at his new boss's house this year. My husband signed us up to bring dessert and I immediately thought of this trifle. It's so incredibly easy to make, yet it's always an impressive treat.
Unfortunately, the husband contracted pink eye a few days before his Christmas party, so we had to stay home. I was bummed because I really wanted to whip up a trifle. However, my disappointment did not last long, as only a week or 2 later it was time for my work Christmas party, which was also a potluck affair at my boss's house. We have a few pregnant teachers this year, so I warned them to steer clear of this sweet treat (though I did bring two additional, non-alcoholic desserts with me), but the rest of the staff swiftly spooned this up.

This recipe calls for canned peaches, but it would be wonderful with fresh peaches in the summer.

Boozy Peach Melba Trifle
Source: my mom
Printable Recipe


Ingredients
One can sweetened condensed milk
1 ½ cups cold water
1 (4 serving size) instant pudding – vanilla or cheesecake.
2 cups whipping cream, whipped, OR one large container Cool Whip
¼ cup plus one Tablespoon Kahlua
1 prepared angel food or pound cake, cut or torn into small pieces
1 (29 oz can sliced peaches, drained
½ cup raspberry preserves

Directions
In a large bowl, combine the sweetened condensed milk and water. Add pudding mix and beat well. Chill five minutes. Fold in the whipped cream/Cool Whip and one Tablespoon Kahlua.

Place half the cake cubes in a 3 to 4 qt. serving dish. Sprinkle with 2 Tablespoons Kahlua, and layer with half the peach slices, ½ cup preserves, and half the pudding mixture.

Repeat layers with the remaining cake, sherry, peach slices and pudding. Garnish with additional preserves and sliced almonds, if desired. Chill for at least an hour before serving. This can also be the night before, which allows the flavors to really meld and intensify.

Do not serve to pregnant people.

Monday, December 21, 2009

Shallota Pasta


I used to menu plan every Sunday for the upcoming week. I liked having all our dinners planned out in advance, as it saved me from unnecessary grocery store trips mid-week, as well as standing in front of the refrigerator for half an hour after I got home from work, wondering what the heck to make for dinner. Sometime over the summer I stopped menu planning, figuring I was home all day anyway, I could just plan on a daily basis.
Of course, that didn't work well, and I soon found myself repeating the old habit of wondering what to make for dinner 20 minutes before my husband would be walking in the door. I'm the kind of wife that likes to set dinner down on the table as the husband is walking in the door, after a long day at work. This doesn't happen all the time, but planning out our dinners in advance sure goes a long way in helping get dinner on the table right as I here the garage door open and the car door slam shut.
Yesterday, as I was getting ready to go grocery shopping, I decided it was time to go back to meal planning. I had somewhat of a grocery list written out, but wasn't really sure what else I needed to buy. Now that we are making an effort to eat more organic foods, I have to be careful not to over spend at the grocery store. Not having a set list would definitely equal spending too much money. So I sat down with my laptop, two favorite cookbooks, and a piece of paper and began planning out our meals for the week.
The result? Efficient, money-wise grocery shopping and some new meals added to this week's menu. The husband blessed this meal by requesting that it be added to "the rotation", though he did ask that I add some grilled chicken or shrimp next time.


Shallota Pasta

Source: Adapted from Rachel Ray's Big Orange Cookbook
Printable Recipe

Ingredients
1 Tablespoon extra virgin olive oil
1 Tablespoon butter
3 garlic cloves, finely chopped
6 large shallots
1/2 pound whole wheat spaghetti
1/2 cup grated Parmigiano-Reggiano cheese
1/2 handful fresh flat-leaf parsley, chopped
salt and pepper to taste
dash chili pepper flakes (optional)

Directions
Peel the shallots and then cut them in half. Thinly slice each half and set aside.

Heat the olive oil with the butter over medium-low heat in a large skillet. Add the garlic ans shallots, season with salt and pepper, and cook until gently caramelized (about 20 minutes), stirring occasionally.

Meanwhile, bring a large pot of eater to boil for the pasta. Salt the water liberally, then add the spaghetti and cook to al dente. When the pasta is almost done, add about 1 cup of the cooking water to the shallots and stir. Drain the pasta and add to the shallots and garlic. Ass the parsley, cheese, and more pepper to taste. Toss for a minute or two to allow the pasta to absorb the sauce. Sprinkle a dash of chili pepper flakes on top and serve.

Tuesday, December 15, 2009

Peppermint Bark


So many blogs have such great intros to their recipes. Tales of life related to food, the great inspiration for a recipe, success and failures in the kitchen. I have none of those things for you today. Heck, who am I kidding. My blog intros leave a lot to be desired...especially when you consider I have a degree in writing and teach English. But I've never been much of a story-teller; I'm much more of a facts-based wordsmith. Even if I could weave an interesting tale, what can I say about peppermint bark? I made this because it's December and I like chocolate. It's incredibly easy and doesn't qualify as cooking or baking in my book, but it's no less of a treat!


Peppermint Bark
Source: Various internet recipes
Printable Recipe
Note: Use a high quality chocolate; I used Guittard.


Ingredients
16 ounces semi-sweet chocolate
16 ounces white chocolate
1/4 teaspoon peppermint extract
6 ounces candy canes

Directions
Unwrap the candy canes, and put them in a ziplock bag (best to double bag it here). Use something heavy to smash the candy canes into a million pieces. I used a glass candle jar...I probably could have used my rolling pin though.

Pour the semi-sweet chocolate and peppermint extract into a microwave-safe bowl. Microwave at 30 second intervals, stirring after each interval, until the chocolate is smooth.

Line a baking sheet with parchment paper and evenly spread the melted chocolate on the paper. Let cool on the counter. If you chill it in the fridge, don't let it completely harden, or the next layer won't stick well enough.

Melt the white chocolate in a microwave-safe bowl at 30 second intervals. Stir after each interval until it is smooth. Once the white chocolate is completely melted spread it on top of the semisweet chocolate in an even layer. While the chocolate is still soft and melty, pour the crushed candy canes on top of it in an even layer. Gently press into the chocolate.

Chill in the refrigerator until hardened. Break into pieces and store in the refrigerator until ready to serve.

Sunday, December 13, 2009

Mashed Potato Soup


December in southern California. What can I say? Pull out your long-sleeved t-shirts and warm sweaters, but leave room for tank tops and warm weather wear. We go from 80 degrees and sunny one day, to freezing winds, grey skies, and threats of rain the next.
As the weather began to turn colder and rainy this week, I found myself craving potato soup. I wanted something thick, creamy, and satifyingly warm on a winter night. This recipe does just that.
One word of caution though; I mashed the potatos with a fork before adding them to the soup, which caused it to *really* thicken up. Either, just cut up into small chunks, or if you mash them like I did, add more milk to the soup. I didn't add any additional milk to account for the extra starch and we wound up with a huge bowl of soup that was almost the consistency of mashed potatos. I loved it, but the husband was hoping for a more liquid-y texture. The original recipe, from Annie's Eats, calls for the potatos to briefly run through the food processor before being added to the soup.
This dish is incredibly filling, so don't worry about planning any side dishes....you won't need them!

Mashed Potato Soup
Source: Adapted from Annie's Eats
Printable Recipe

Ingredients
5 baking potatos, scrubbed clean
4 tbsp. unsalted butter (I used salted as that's all I had on hand)
½ cup all-purpose flour, divided
6 cups 2% milk
2 tsp. salt (I started with 1 tsp. to account for the salted butter, and added more to taste)
Freshly ground black pepper, to taste
1 1/4 cups shredded sharp cheddar cheese
½ cup green onions, chopped
½ cup light sour cream

Toppings
Additional cheese
Additional green onions
bacon bits

Directions

Poke several holes in each potato to allow steam to escape. Microwave the potatos for about 20-30 minutes, or until cooked through. Once microwaved, chop into small chunks or mash with a fork. I kept the skins on most of the potatos, but you can discard them if you like.

Melt the butter in a large pot. Add ¼ cup of flour to the pot and whisk into the butter. Cook, whisking constantly, until golden brown, about 2 minutes. Whisk in the 6 cups milk and the remaining flour. Cook until thick and bubbling, about 6-8 minutes. Be sure to whisk thoroughly to ensure the soup does not burn on the bottom.

Mix in the potato, stirring to fully incorporate them into the soup. Whisk in the salt, pepper, and cheddar cheese and stir until the cheese is melted. Remove from the heat, stir in the green onions and sour cream.

Ladle into bowls and serve with your favorite toppings and a hunk of crusty bread.

Saturday, December 12, 2009

Fake Fries


My husband and I are increasing our effort to eat at home more often. In the past few years we've gone from eating out 4-6 nights a week and 2-4 breakfasts/lunches a weekend, to maybe 2 nights a week and maybe 1-2 breakfasts/lunches a weekend. But even that can be cut down, not only to save our pocket books, but of course, our waistlines.

This is sometimes incredibly difficult considering we live right next to an In-N-Out, Taco Bell, Arbys, Weinerschnitzel, McDonalds, and a Chik-Fil-A, as well as a nearby handful of terrific Mexican places, inexpensive yet delicious sushi, and numerous other restaurants.

We recently made homemade Big Macs using ground turkey and sandwich thins. Alas, there was no "special sauce", lettuce, tomatos, onions, or sesame buns. Guess, they weren't really Big Macs then.

Just like these aren't really french fries.

Fake Fries
Source: Me
Printable Recipe


IngredientsLink
2 large baking potatos
salt
pepper
Cajon Seasoning or Season Salt
olive oil

Directions
Pre-heat the oven to 400 degrees.

Slice the potatos into long wedges or strips, whatever size and shape suits your. Place them in a bowl, drizzle with olive oil (I use an oil mister), and season liberally with seasonings. Toss to ensure all potato slices are seasoned.

Place in a single layer on a cookie sheet. Bake for about 10-15 minutes, or until the outside is crisp.

Monday, December 7, 2009

Turkey Stock

Even though Thanksgiving was over a week and a half ago, up until yesterday, I still had the leftover turkey sitting in my fridge, waiting to either be eaten or thrown away. I finally pulled that sucker out, cut off any remaining meat, and then broke up the bones to make stock.

I love soup, but I have noticed that the canned stuff never tastes good enough. The carrots are mushy, the broth is missing flavor, there's not enough meat. I could go on. So after a quick Google search I found several recipes for homemade turkey broth.

Pull out your largest stock pot, break up those bones, and plan to spend a chilly afternoon at home. Next time you want soup, or need to use some broth, you'll be glad you did.

Turkey Stock
Source: various internet recipes

Ingredients
Turkey bones
2-3 carrots, roughly chopped
2 ribs celery, roughly chopped
1 large onion, roughly chopped
3 cloves garlic, peeled
3 bay leaves
1 tablespoon dried sage
several springs of whatever fresh herbs you have (I think I used tyme)
2 tablespoons pepper
1-2 teaspoons salt

Directions
Place all ingredients in a large pot (at least 8 quarts, but the bigger the better). Fill the pot with water, covering the solids as much as possible.
Simmer for 4 hours, replacing any water as needed. (I simmered mine with the lid off to keep if from reaching a boil.)
Strain out the solids and chill the remaining broth. Freeze any broth you are not going to use immediately.

Now you have the base for homemade soup. Super easy!

Wednesday, December 2, 2009

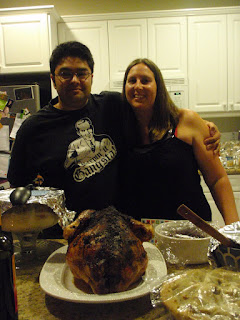
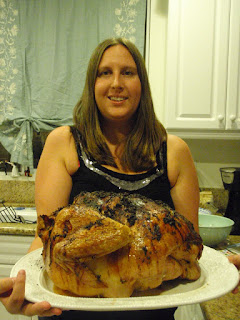
Sage Butter-Roasted Turkey with Cider Gravy

My husband and I bought a new condo with a kitchen built for entertaining and dinner parties in late October/early November 2008, but I felt like we moved in too close to Thanksgiving to host, so we traveled to both sets of families for the holiday. I was exhausted and overly full by the time we got home and told my husband I was never doing that again.


Flash forward to this year; we've been in our condo for over a year, and I have a brand new kitchen table that seats 8, so we decided this would be the year to host. Being the big show-off that I am, I bought Bon Appetite's Thanksgiving issue and began ear-marking various recipes I wanted to serve. Having never made a whole turkey before I wanted something easy to prepare, but impressive to serve. This sage butter turkey was just the right combination of both! I omitted the original dry-rub and brined my turkey instead. However, I've linked to Bon Appetite's recipe in case you're interested in their method.


Now the recipes all say to roast the turkey breast side up, but having never cooked a turkey before, I had no idea which side was the breast. It looked pretty much the same to me! They really should come labeled. So once my turkey was out of the brine, I threw it into the roasting pan, only to have my wise mother tell me I'd cooked the bird upside down! Oh well. This was the juiciest, moistest turkey I'd ever eaten...and I will forever cook turkeys upside down from now on!

The cider gravy was slightly sweet, but was a tasty pairing to the sage turkey. I omitted the apple jack as I didn't want to spend the money on it, and it still turned out fabulous!

This bird was heavy!


Sage Butter-Roasted Turkey with Cider Gravy

Adapted from Bon Appetite


Ingredients


Brine
4 gallons water

2 cups of table salt (1/2 cup per gallon of water...see this site for some good tips on brining)

1 handful fresh sage leaves, torn


Turkey
1 20-pound turkey, rinsed, patted dry; neck, heart, and gizzard removed
1/2 cup unsalted butter
1/2 cup chopped fresh sage
3/4 cup fresh refrigerated apple cider or fresh refrigerated apple juice
gravy
2 cups (or more) Turkey Stock or low-salt chicken broth
2 tablespoons dried sage
several springs of fresh rosemary or tyme


Gravy
3/4 cup fresh refrigerated apple cider or fresh refrigerated apple juice
2 tablespoons all purpose flour
2 to 3 tablespoons Calvados (apple brandy) or applejack brandy (I omitted this)
1 tablespoon chopped fresh sage


Directions
Place the turkey in a large brine bag and fill with 4 gallons of water (16 cups = 1 gallon). Stir in the salt and sage. Brine in the refrigerator overnight.


Set rack at lowest position in oven and preheat to 375°F. Remove the turkey from the brine, rinse throughouly and pat dry. Tuck wing tips under; tie legs together loosely. Set in a roasting pan. (Bon Appetite, and most other recipes really, call for the turkey to be cooked breast side up. I inadvertenly cooked mine breast side down, but loved the results. You do what you want.)


Stir butter and chopped sage in small saucepan over low heat until butter melts. Brush all over turkey; sprinkle liberaly with pepper.


Roast turkey 1 hour; baste with any pan juices. Reduce oven temperature to 350°F. Pour 3/4 cup apple cider over; turn pan around. Continue to roast turkey until instant-read thermometer inserted into thickest part of thigh registers 165°F, basting and turning pan occasionally for even cooking, about 1 1/4 hours longer. (I cooked my turkey until it reached 185 degrees. Since I cooked it upside down, it was still underdone at 165. The brining process and the juices running into the upside down breast kept the meat incredibly moist.)


Transfer turkey to platter; tent loosely with foil and let rest 30 to 45 minutes. If you cook yours breast side down, as I did, flip it over just before you are ready to carve.


Gravy Directions
Pour all pan juices into large measuring cup. Spoon off fat that rises to surface.


Transfer 2 tablespoons fat to heavy large saucepan; discard remaining fat.


Place turkey roasting pan over 2 burners. Add 2 cups stock or broth and 3/4 cup cider. Bring to boil over high heat, scraping up browned bits. Boil liquid until reduced to 1 1/2 cups, about 6 minutes. Add mixture from roasting pan to degreased pan juices. If necessary, add enough stock to measure 3 1/2 cups stock mixture.


Place saucepan with turkey fat over medium-high heat. Add flour and whisk 2 minutes. Whisk in stock mixture. Boil until gravy thickens enough to coat spoon thinly, about 6 minutes. Whisk in 2 tablespoons Calvados, or more to taste, and sage. Season with salt and pepper to taste.

Serve turkey with gravy.


I swear it's not burnt; the sage got a bit crispy and dark, but the skin and meat were perfect!


Thursday, November 26, 2009

Sausage Stuffing

When I was a super sophmore in community college I asked my journalism professor to recommend some Cal State schools that had good journalism programs and were far away from home. He named Cal State Northridge, Cal State Long Beach, and San Francisco State; I immediately settled on SFSU because it was the furthest from home.

Once the holiday season rolled around, my parents wanted me to come home for Thanksgiving, but I did not want to make the long drive home, so I opted to visit a friend in Santa Cruz instead. Well, it's a good thing I didn't try driving home to my parent's house; my car wound up breaking down on a narrow windy road in the Santa Cruz Mountains. Thankfully, I had AAA at the time, so I called them for a tow, packed up my pumpkin pie, and was towed back to my friend's house in San Jose.

That was one the the best Thanksgivings ever. And my friend's mom made the best stuffing ever, filled with chunks of browned sausage.

Sausage Stuffing
Printable Recipe
Source: my friend's mom

Ingredients
1 pound raw sausage, casings removed (I use turkey sausge)
a bunch of bread
4 ribs celery, chopped
1 large onion, diced
4 cloves of garlic, diced
1 stick of butter
4 cups chicken broth
a palm-full of chopped fresh sage
1-2 tablespoons dried sage
a palm-full of chopped fresh oregano
1-2 teaspoons poultry seasoning
2 teaspoons pepper
a sprinkling of garlic salt

Directions:
Pre-heat the oven to 350 degrees.

In a large bowl, tear apart the bread into chunks. I used about 2 to 2 1/2 loaves of French bread. Stale bread works best, and don't be afraid to mix it up. I used a few pieces of chili-fleck sourdough bread, a chunk of whole wheat bread, a large loaf of French bread, and a long skinny baguette.

Cook the sausage on the stovetop, using a wooden spoon to break it into chunks. Once it is browned and cooked all the way through, add it to the bread.

In the same pan used to brown the meat, sautee the onion, celery, and garlic with the butter. Cook until soft and fragrant. Add it to the bread and meat mixture.

Season with all the seasonings and herbs. Use your hands to throughly mix everything together.

Move the stuffing into a greased 9 x 13" casserole dish. Pour the brother over the top. Turn the stuffing over a few times to ensure that it is well mixed.

Bake for about 35-45 minutes.

Note: I make this the night before Thanksgiving, so all I have to do is pop it into the oven for a few minutes and re-heat on the big day.

Sunday, November 22, 2009

Watch out Flame Broiler!


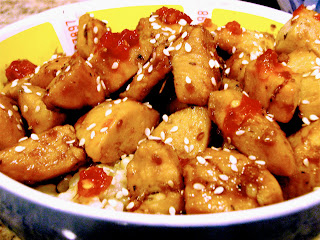
I heart me some Flame Broiler. Teriyaki chicken, brown rice, a scattering of scallions, and a sprinkle of sesame seeds. Add a few dabs of hot chili sauce, and I'm content. But, I know I can make the same thing at home for pennies on the dollar, so tonight I challenged myself to do just that. 2 chicken breasts, a 1/2 cup or so of teriyaki sauce, some seasonings, brown rice, and there you go! This is really fast, just make sure you start the brown rice a good 30 minutes before the chicken; it takes forever to cook!

Teriyaki Chicken Bowls Printable Recipe Source: Me

Ingredients
2 boneless, skinless chicken breasts
1/2 cup soyaki (or your fav teriyaki sauce)
pepper to taste
a dash of salt
a dash of cayenne
1-2 teaspoons no-salt seasoning (its a mixture of various seasonings)
2 cups uncooked brown rice
chili paste to taste
1-2 teaspoons sesame seeds

Directions
Cook the brown rice in your rice cooker, starting about 20-30 minutes before you cook the chicken.

Chop the chicken into small, bite-sized pieces. Heat a large, non-stick pan over medium high heat and add the chicken once the pan is hot. Season with the salt, pepper, cayenne, and no-salt seasoning. Cook on medium-high heat. When you have about 2-3 minutes of cooking time left,pour the soyaki over the chicken and cook the rest of the way through, so that the chicken is no longer pink in the middle.

Serve the rice in a bowl, spoon the chicken on top, sprinkle with the seasame seeds. Dab a bit of chili paste on top if you like some heat! Drizzle an additional tablespoon of soyaki on the top and enjoy.
(note: I didn't have any scallions on hand, or I would have chopped a few up and added them on top of the chicken.)

Wednesday, November 18, 2009

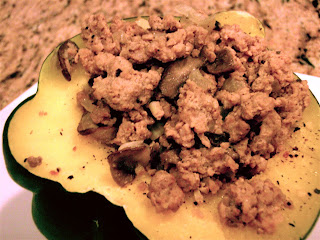
Ground Turkey Stuffed Acorn Squash


This is a quick (30 minutes...45 including prep) and healthy that's great for a weeknight dinner. I can be pretty picky about veggies, but I've found that I really enjoy winter squash, including acorn squash and this is a fun way to serve the veg.

PS. I don't know why my pictures are coming out so yellowy lately. Ugh!

Turkey Stuffed Acorn Squash
Printable Recipe
Source: Me

Ingredients

1 acorn squash
1 pound ground turkey
1-2 cloves garlic, minced
1/4 onion, minced
5 large baby bella mushrooms (or whatever you like/have on hand), diced
1 tablespoon dried sage
2 teaspoons pepper (we like a lot of pepper. adjust to suit your tastes)
1 teaspoon garlic salt
dash chili powder
dash cayenne pepper
a sprinkle of salt
1 tablespoon vegetable oil

Directions
Pre-heat the oven to 375 degrees. Cut the acorn squash in half and scoop out the seeds and goopy flesh.

Fill a shallow pie pan with a few inches of water. Place the acorn squash in the water, flesh-side down. Bake for 30 minutes, or until fork tender.

Meanwhile, heat the oil in a large non-stick pan. Sautee the garlic, onions, and mushrooms until fragrant.

Season the raw turkey with the sage, pepper, salt, garlic salt, chili powder, and cayenne. Using your hands, or a large spoon, mix the seasonings into the raw meat.

Add the seasoned ground turkey to the pan and cook, breaking into small pieces as it cooks. Drain the fat from the meat and return to the pan to keep warm.

Once the acorn squash is cooked, remove from the pan of water and lightly season with salt and pepper. Add a bit of butter if desired. Fill the cavity of the squash with the turkey mixture and serve.

Wednesday, October 28, 2009

Pumpkin Cream Cheese Muffins


It's fall, which in the baking world, means time for pumpkin. I am not a huge Stabucks fan; I pretty much only order their black iced tea (no sweetener) or in the winter, their caramel apple cider. But I do love the pumpkin cream cheese muffins they bring out every fall. The big dollop of cream cheese in the middle is such a great contrast to the moist pumpkin. But at nearly $2 a pop, I can't afford to indulge in these treats very often, so I scoured the internet looking for a knock-off recipe. Ok, I didn't scour the internet; I pretty much just used the first recipe I found. But these muffins came out even better than the Starbucks original. They are dense, moist, spicy, and the cream cheese is perfect. I couldn't find any pumpkin seeds at my grocery store, so I omitted them, but if I had found them, I think I would have toasted them in butter and brown sugar.

These muffins taste even better a day or two after making them. The spicyness of the various spices really kicks in, giving these muffins a more pronounced tasted. That came out weird...they just taste better after a few days. I took a platter of these muffins to work and they were completely gone within an hour. I think that's a pretty good indicator of how great they really are!

The original recipe called for 1 1/4 cups of vegatable oil. I replaced the entire amount of oil with applesauce to cut down on some fat and calories. I also used neufchatel cheese instead of cream cheese; the grocery store worker told me they were interchangeable, with neufchatel cheese containing less fat than regular cream cheese. I didn't notice any difference in flavor. Also, the original recipe called for 2 cups white sugar, but I decided to use half white and half brown, just to change things up a bit.


Pumpkin Cream Cheese Muffins
Adapted from Musings of a Mommy
Printable Recipe

Ingredients
For the muffins:
3 cups flour
1 heaping teaspoon cinnamon
1 heaping teaspoon nutmeg
1 heaping teaspoon ground cloves
4 1/2 heaping teaspoons pumpkin pie spice
1 teaspoon salt
1 teaspoon baking soda
4 eggs
1 cup white sugar
1 cup brown sugar
2 cups canned pumpkin puree
1 1/4 cups unsweetened applesauce

For the cream cheese filling:
8 ounce package cream cheese (or neufchatel cheese), softened
1/2 cup powdered sugar
1/2 teaspoon vanilla
1 tablespoon brown sugar


Directions:
Pre-heat your oven to 35o degrees.

In a large mixing bowl, combine the first 7 ingredients for the muffins. Mix together until just combined.

In a seperate bowl, beat the eggs and mix in the sugars.

Add the egg and sugar mixture to the dry ingredients. Add in the pumpkin puree and applesauce, and mix until well combined.

Spoon into greased muffin tins. Set aside.

In a medium bowl, combine the cream cheese, vanilla, powdered sugar, and brown sugar. Mix until well combined.

Spoon into a sandwich bag sized ziploc. Cut off the tip of one corner. Pipe the cream cheese into the muffin batter, pushing it down into the batter slightly.

Bake for 20-25 minutes, or until a toothpick inserted into the muffin (avoid the cream cheese) comes out clean. Let cook 5-10 minutes before serving.

Sunday, October 25, 2009

I miss you!

I know it's been a long time since I've posted; I went on vacation for 3 days and now I am currently house sitting, so I haven't had much chance to blog lately. But stay tuned--I've got some new recipes ready to blog, including pumpkin cream cheese muffins.

Tuesday, October 13, 2009

Chicken Noodle Soup


It seems like summer ended and the cold weather came in over night! What happened to Indian Summer this year? I am missing the warm, but not hot, southern California fall days we usually have in October? It is even going to rain this week! Ugh.
But the good part about this cold weather is that we can enjoy a big bowl of hearty soup. And that is exactly what this chicken noodle soup is: hearty, filling and delicious.

Chicken Noodle Soup Source: Adapted from How to Boil Water Printable Recipe

Note: this makes a huge pot, serving 10-12 people

Ingredients
3 carrots
3 ribs celery
1/2 an onion
3 cloves garlic
4 tablespoons butter or olive oil
1/2 teaspoon salt
1 handful fresh sage (about 6 large leaves), chopped
1 tablespoon fresh oregano
3-4 springs fresh thyme
12 cups low sodium chicken broth
1 package egg noodles
1 rotisserie chicken, skin removed
3/4 lemon, juiced
zest of 1 lemon
lots and lots of pepper

Directions

Peel the carrot. Slice the carrot, celery, and onion. Smash and peel the garlic. Chop into large chunks.

Heat the butter in a large pot over medium heat. Add the vegetables and cook until softened, about 8-10 minutes. Season with salt and pepper. Add the sage, oregano, and thyme (discard stems).

Add the broth and lemon juice and bring to a boil over high heat. Add the pasta and lemon zest and cook uncovered, just until the pasta is tender, about 7 minutes. Season with pepper. Meanwhile, shred the chicken into large chunks.

Add the shredded chicken and cook until the chicken is heated through. Season with pepper.

Serve with a hunk of French bread to soak up the broth.

Monday, October 12, 2009

Buffalo Potato Wedges


These are a great football snack. They do take about an hour, start to finish, but if you start chopping potatos during the pre-game shows, you'll have your snack by the end of the first quarter. They are spicy, so make sure you have a bowl of bleu cheese dressing and a beer handy!

Note: the following recipe easily serves 4-5 people. You can halve it if there are just two of you.

Buffalo Potato Wedges
Source: Adapted from Love Delicious
Printable Recipe

Ingredients
5 baking potatos
1/2 cup buffalo wing sauce
1/2 cup butter
salt
pepper
garlic powder
olive oil

Directions
Pre-heat the oven to 375 degrees.

Wash the potatos to remove any dirt. Slice into wedges (I prefferred thinly sliced, but thick works too), but don't peel the skin.

Place the wedges on a greased cookie sheet, in one layer. Spray or brush with olive oil (just a thin coating is fine). Sprinkle generously with salt, oepper and garlic powder.

Cook the potato wedges for 30 minutes. Meanwhile, melt the butter in a bowl and then mix in the buffalo sauce.

After 30 minutes, remove the potatos from the oven. Now is a good chance to try one and see if it has enough salt, pepper, and garlic powder for your tastes. If not, season again. Then, drizzle the wing sauce and butter mixture over the wedges. If you like them really spicy, put a thick coating over each potato. Otherwise, a heavy drizzle will do.

Return them to the oven and bake for an additional 15 minutes. If your wedges are really thick (pver 1/2"), you may want to cook them for an additional 5 minutes.

Serve with bleu cheese dressing to dip, and an icy beer.

Touchdown!

Sunday, October 11, 2009

Korean Beef with Brown Rice


I don't have a real recipe for you today, as the main component of this dish is pre-marinated meat I pick up at the Korean market. But if you have a Korean grocery store near you and they carry pre-marinated Korean beef, this is a really quick, easy, and flavorful dish. I'm sure there are tons of recipes for Korean beef online (or from my friend at work, who i have been trying to get the recipe from since last October!), so you can always make the entire thing from scratch if you'd like.

Before you get started on cooking the meat, be sure to get your rice going so it is ready when the beef is.

Korean Beef with Brown Rice
Source: me
Printable Recipe

Ingredients
1 pound marinated Korean beef
1 small onion (I used white, but you can use any type of onion here), chopped
4 garlic cloves, diced
1 tablespoon sesame oil
1 cup uncooked brown rice
2 cups water

Directions:
Combine the rice and water in a rice cooker, turn it on and let it cook for you.

Heat a large wok over high heat. Add the seasme oil and swirl around the pan, up the sides, to coat the surface.

Once the oil is hot, add in the onions and garlic, cooking until softened and garlic is fragrant.

Add in the beef, reserving the juices/marinade, and stir fry for about 5 minutes. Add in the juices/marinade and continue stir frying until the meat is cooked through (about 10 to 15 minutes).


Serve the meat over the rice.

Sunday, October 4, 2009

Crockpot Tri Tip


I have not had much success in cooking with my crockpot since I bought it about 2-3 years ago. Everything came out gross, mushy, too liquidy, and just not up to par. I was about ready to get rid of it when my mom advised me to try cooking a tougher cut of beef in the crockpot (I had previously only made boneless, skinless chicken breasts). My husband and I were still skeptical, but Von's had untrimmed tri tip on sale for $2.47 a pound today (they normally charge at least $8 a pound), AND I had a coupon for an additional $2 off of one tri tip. So I headed off to the store and bought two 3-pounders and hoped for the best.

I didn't use a recipe for this one. I just coated the meat in pepper, added a bit of salt, and some crushed garlic and turned on the crock pot until the meat was cooked and tender. This turned out fantastically! My husband, who has a tiny appetite, ate two servings and finished the few bites left on my plate. We served it with steamed green beans and I spooned the liquid left in the crock pot on top of the meat. We're planning on eating the leftovers, smothered in BBQ sauce, for dinner tomorrow.

This meal has converted me into a crockpot fan; it couldn't be easier. Season the meat, throw it in the pot, and turn on. Several hours later, dinner is ready.

Crockpot Tri Tip

Source: ME!
Printable Recipe

Ingredients
  • 3 pound untrimmed tri tip
  • pepper
  • salt
  • 3 cloves garlic
Directions

Place the tri tip in the crockpot insert, with the fatty cap facing up. Coat the top in pepper (I used a combination of black pepper and freshly ground citrus pepper).


Chop up the garlic and then sprinkle with salt. Smash the garlic and salt together with the back of a spoon, making a chunky paste. Sprinkle the paste on top of the tri tip.

Let stand for 30-60 minutes.

Cook in on low for 8 hours, or on high for 4 hours.

Slice and serve. Or slice, smother in BBQ sauce, and make sandwiches.

Saturday, October 3, 2009

Pumpkin Pie Ice Cream


My husband is the best at gift giving. Ever since we met he has always put a ton of thought and care into purchasing me gifts. A few months into dating he surprised me with a pair of pink Converse just because he knew I liked them. Christmas and birthdays are no different; I always get the best gifts. Not that presents are what makes a relationship, but it is nice to be married to someone who knows exactly what I want.

This year my birthday was no exception. I talked about buying the ice cream attachment for my Kitchen Aid mixer all summer, but was hesitant to spend that much money. So of course, I received the coveted attachment for a birthday gift last week!

I wanted to try a simple, yet seemingly fancy flavor for my first attempt. Luckily my KA attachment came with several recipes, including this one for pumpkin pie ice cream. A perfect match of fall flavors and the 90+ degree southern California weather!

Pumpkin Pie Ice Cream

Source: Adapted from Kitchen Aid
Printable Recipe

Ingredients
  • 1 1/2 cups light cream (My store didn't have this, so I just used whole milk. You can also sub 1/2 and 1/2)
  • 6 egg yolks
  • 3/4 cup sugar
  • 1/2 teaspoon vanilla extract
  • 3/4 teaspoon pumpkin pie spice (I used 1/2 teaspoon cinnamon and 1/2 teaspoon nutmeg)
  • 1 1/2 cups heavy cream (Again, my store didn't have this, so I used heavy whipping cream)
  • 1 1/2 cups canned pumpkin puree
  • 2 teaspoons brown sugar (my addition)

Directions
(Make sure to freeze your freezer bowl at least 15 hours in advance)

Scald the light cream in a heavy saucepan. In a medium bowl, whisk together the egg yolks, white sugar, and vanilla.

Gradually whisk the cream into the yolk mixture. Add in the spice.

Return the entire mixture to the saucepan and stir over medium-low heat until the mixture thickens; about 10 minutes. Do not allow to boil. Remove from heat.

Whisk in the heavy cream, pumpkin, and brown sugar.

Cover and refrigerate until well chilled (over night is best).

Assemble the freezer bowl attachment and turn the mixer on to ONE. Pour the chilled ice cream batter into the bowl and continue to stir on ONE for 15-20 minutes, or until it is the desired consistency.

Serve immediately, sprinkled with nutmeg, or freeze.

Makes about 8 one cup servings.

Sunday, September 27, 2009

Paco's Pepper Snacks

I had the best class schedule ever my senior year of high school: English, Economics/Civics, Teacher's Assistant, Swim Team, Foods, and something else. My favorite class was of course foods. I even TA'ed for the class 2nd semester...yeah, I TA'ed 2 periods that semester. I loved high school!

My friends always joked and asked if I was taking Foods 5.

I don't know if I really learned much in my Foods class, but I do remember loving to eat everything we made. This recipe is one we made in that class; its since become a Thanksgiving staple in my house. It is expected that I will make these appetizers, as well as brie and roasted garlic, or it just isn't Thanksgiving. I baked some for my in-laws last Thanksgiving, and now they are fans as well.

My dad recently came over to watch football with my husband, so I figured I'd whip up a batch for them to munch on. In less than 15 minutes, cheesy goodness is ready to eat!

Note: I have no idea how my teacher got the name for these snacks, but I've just gone with it.

Paco's Pepper Snacks
Source:
My high school foods teacher
Printable Recipe

Ingredients
1 eight ounce package cream cheese
1 can diced ortega chilis
2 tubes Pilsbury crescent roll dough
1/2 cup-1 cup shredded cheese (I used the pre-shredded bag of Mexican blend)
1-2 teaspoons tabasco, optional (I omit this)

Directions:
Pre-heat the oven to 375 degrees.

In a medium bowl, mix together all of the ingredients, except the crescent roll dough. Make sure it is well combined, without any lumps of cream cheese.

Open the crescent roll tubes and unroll the dough. Pull apart into 4 rectangles, but do not seperate into triangles. Squeeze together the seams of the triangles, forming a solid rectangle.


Spoon the filling onto each rectangle, spreading into an even layer all the way to the edges.


Roll the rectangles up, gently sealing the seam.


Using a serrated knife, gently cut each roll into 3/4" thick rounds. Lay each round flat on a greased cookie sheet.


Cook for 10-12 minutes, or until the dough is golden. Let cool for at least 5 minutes before moving to a platter.


Makes about 4 dozen bite-sized appetizers.

Saturday, September 26, 2009

Apple Cider and Salami on a Stick

My birthday is coming up in just a few days (September 29th, if you're interested!), so my husband and I decided on a early celebration this weekend, apple picking. We drove about 30-40 miles east, into the mountains of Yucaipa to the apple town of Oak Glen.


We followed the windy road through the mountains until we reached Riley's Farms. This place is known for their Colonial-era reenactments and their 5 pound apple pies.


We left shortly after I taught the last swimming lesson of the season (which did not go very well), and by the time we got there I was starving. We lined up for some over-priced, disappointing BBQ, and ate by the entertainment of an old-timey country band. We then moseyed into the General Store and tried on all the hats, before walking up the hill towards the apple orchards.

I'm trying to pull a serious, "Abe Lincoln" look here.


The Husband as a Confederate.

Then I joined the Confederacy...
This was not The Husband's idea...


5 minutes later we arrived, paid our$9 ($7 for a bag, plus $2 admission...lame), waited while the guy tried to figure out the change we were owed from a $20, and then headed into the orchard. Tons of rotten apples lay at the base of each tree, but the trees themselves were pretty much bare, save for some half-eaten, bug-burrowed apples at the top. We picked less than 10 apples, decided there was no way in hell we were paying $9 for ten crappy apples, so we "accidentally" dropped the apples on the floor and headed back for a refund. The cashier gladly gave us a full refund, explaining that they were trying to tell the manager that the trees were picked out, but the manager wouldn't listen.


We walked back towards the general store, goofed off in the raspberry bushes, and then we....I mean, I....decided it would be fun to make a gallon of apple cider. Back into the General Store, we paid our $15 (for a GALLON. extortion, much?) and then joined another line outside to fill a bushel with pre-picked apples. I threw them into the grinder, while Omar had the tough task of turning the crank, crushing the apples into a waiting basket. Once we smashed up over 100 apples, the basket full of apple chunks was then smashed down, squeezing the juice into a bucket. The deliciousness was then strained into a funnel and into a plastic gallon milk jug. I also may have drank a big mouthful straight from the metal bucket...

We then headed back down the road, toward the main part of town, and hit up a huge sweets shop for an apple cider slushie and ice cream. Apparently my husband is still 5; he ordered bubble gum ice cream. After walking around and eating, while also taking to some weirdo selling homemade skull caps (and I must add, he was scaring all of his customers away), we decided it was time for more snacks. I just wanted a soda, and thought Omar would be getting his favorite treat-a caramel apple. So needless to say, I was surprised when he opted for the salami slice on a stick....he doesn't even like salami! But apparently meat on a stick is a novelty worth buying.

Hours after setting out to pick some apples, we made our way back down the mountain with a gallon of freshly pressed cider, salami on a stick, and two glass-bottled "vintage" Cokes, yet not a single apple. There goes my plan to make myself a caramel apple birthday cake tomorrow.

P.S. I promise to blog some actual recipes soon. I haven't made anything blog worthy, or that isn't already on my blog, in awhile. :(

LinkWithin

Blog Widget by LinkWithin