Showing posts with label dessert. Show all posts

Monday, June 27, 2011

7 Layer Bars


I recently brought dinner to a friend of mine who had a baby. The night before I planned to visit, I realized I didn't make any kind of dessert-you can't bring someone dinner and leave out the sweets! I didn't have a lot on hand (no milk really limits you in baking!), but I figured I could throw something together. A quick Google search lead me to these 7-Layer Bars, and luckily I had nearly all of the ingredients in my pantry; I did have to sub milk chocolate chips for the white chocolate, but really, who's going to complain about more chocolate?!

These bars are thick, a bit chewy, and wonderfully sweet. They're easy to whip up and a complete crowd pleaser. What more could you ask for in a dessert?

PS If you're looking for an easy, yet impressive dessert for the 4th of July, these cookies definitely fit the bill.

Seven-Layer Bars
Source: Brown-Eyed Baker
Printable Recipe

Ingredients

1 cup sweetened flaked coconut
8 tablespoons (1 stick) unsalted butter
9 graham crackers (5 ounces), crushed
1 cup finely chopped walnuts
1 cup semisweet chocolate chips
½ cup white chocolate chips (I used milk chocolate)
½ cup butterscotch chips
1 (14-ounce) can sweetened condensed milk

Directions

Adjust an oven rack to the lower-middle position and preheat to 350°F. Spray a 9×13-inch baking pan with non-stick spray. Line the pan with two overlapping pieces of foil or parchment paper, leaving overhang to act as handles for lifting the bars out of the pan. Spray with non-stick spray.

Spread the coconut on a baking sheet and bake until the outer flakes just begin to brown, about 4 minutes. (Keep a close eye on it – coconut can go from slightly browned to burnt in a matter of seconds.) Set aside.

Melt the butter and combine with graham cracker crumbs in a small bowl. Toss together until the butter is evenly distributed. Press the crumbs evenly onto the bottom of the prepared pan.

In order, sprinkle the walnuts, chocolate chips, white chocolate chips, butterscotch chips, and coconut over the graham crumbs. Pour the condensed milk evenly over the entire dish.

Bake until the top is golden brown, about 25 minutes. Cool in the pan on a wire rack to room temperature, about 2 hours.

Remove the bars from the pan using the foil or parchment handles and transfer to a cutting board. Using a sharp knife or bench cutter, cut into 2" by 3" bars.

Monday, March 21, 2011

Samoa Girl Scout Cookie Ice Cream


My favorite Girl Scout cookies are Tag-a-logs and Samoas; so much so that when I bought a box on my way into the grocery store during this year's Girl Scout Cookie season, it was half-eaten as I walked back out of the store. hehehe My friend's daughter is a Daisy this year, so I bought several boxes of cookies from her, and as I was eating a handful of Samoas one day, I thought about the Thin Mint ice cream I've seen in stores in the past.

"These cookies would make some amazing ice cream!" I thought to myself, pulling The Perfect Scoop off the counter. I thumbed through the tome, looking for inspiration for the base, already planning to mix in hot fudge, caramel and cookie pieces. David Lebovitz's Toasted Coconut ice cream jumped out as the perfect foundation for the ice cream, providing a creamy, coconuty flavor, that is key to the Samoa taste.

As the ice cream churned, I flipped to Dave's recipe for caramel sauce, which was super easy to make and didn't involve any corn syrup, which I saw in other recipes online. I used my own hot fudge technique and chopped up some cookies; as soon as the ice cream was done churning, I added my mix-ins and anxiously awaited the completion of the hard freeze. Oh the finished product! SO good and a perfect recreation of my favorite Girl Scout cookie. :)

David Lebovtiz's ice cream calls for a vanilla bean, which I can never seem to find in any stores around here, so I used additional vanilla extract in its place. I'm sure the actual bean produces a much richer flavor if you can find one, but don't stress if they are as elusive for you as they are for me.

Oh and one last note; if you don't have any leftover Samoas (I don't blame you, we ate 3 boxes in about two weeks here!) Keebler's Coconut Dream cookies are almost a dead-on replica. The only difference between the two is the cookie base; the Girl Scout cookie base is more crisp than it's doppelganger.

Samoa Ice Cream
Source:
inspired by Girl Scout cookies, ice cream base and caramel sauce from The Perfect Scoup, hot fudge- no source.
Printable Recipe

Mix-Ins

4 Samoas or Coconut Dream cookies
caramel sauce (see below)
hot fudge sauce (see below)

Ice Cream Ingredients

1 cup dried, shredded, unsweetened coconut
1 cup whole milk (I used reduced fat as that's what I had on hand)
2 cups heavy cream
3/4 cup sugar
big pinch salt
1 vanilla bean, split in half lengthwise
5 large egg yolks
1/2 teaspoon vanilla extract

Ice Cream Directions

Pre-heat the oven to 350 degrees. Spread the dried coconut on a baking sheet and back for 5 to 8 minutes, stirring frequently so it toasts evenly. Remove from the oven when it is golden brown and fragrant.

In a medium saucepan, warm the milk, 1 cup of the heavy cream, sugar, salt, and the toasted coconut. Use a paring knife and scrape all of the vanilla seeds into the warm milk, adding the pod as well. (I just poured in about 3/4 of teaspoon vanilla extract at this point.)

Cover the pan, remove from the heat, and let steep at room temperature for one hour.

Rewarm the coconut-infused milk mixture. Set a mesh strainer over a medium bowl and strain the coconut-infused mixture into the bowl. Press down on the coconut firmly with a spatula to extract as much liquid and flavor as possible. Remove the vanilla bean pieces and discard the coconut. Pour the strained liquid back into the saucepan and set aside. Save the medium bowl.

Pour the remaining one cup heavy cream into a large bowl and set the mesh strainer on top.

In the medium bowl (used when straining the liquid from the coconut), whisk together the egg yolks. Slowly pour the warm coconut-infused mixture into the yolks, whisking constantly. Scrape the mixture back into the saucepan.

Stir the mixture over medium heat with a spatula, constantly scraping the bottom as your stir, until the mixture thickens and coats the spatula. Pour this mixture through the mesh strainer, into the heavy cream. Mix in the 1/2 teaspoon vanilla extract and stir until cool over and ice bath.

Cover the bowl and chill in the refrigerator over night. Churn in your ice cream maker, according to manufacturer directions.

Once ice cream has finished churning, transfer half of the soft ice cream to a freezer-safe container. Stir in half of the chopped cookies, and fold in 1/4 of the caramel sauce and half of the hot fudge. Layer the remaining ice cream on top and repeat.

Caramel Sauce Ingredients

1 cup sugar
1 1/4 cups heavy cream
1/4 teaspoon coarse salt
1/2 teaspoon vanilla extract

Caramel Sauce Directions

In a deep, large, heavy-duty saucepan, spread the sugar in an even letter. Cook the sugar over low to medium heat, watching it carefully. When it begins to liquefy, use a heatproof spatula to very gently stir it to encourage even melting.

Gently stir until all of the sugar is melted and the caramel turns a deep amber color. (Note: According to The Perfect Scoop, it will smoke at this point. This did not happen to me, but don't be alarm if it does for you!)

Immediately remove from the heat and whisk in half of the cream, which will steam and bubble furiously. Carefully stir until the sugar is dissolved, then gradually whisk in the remaining cream, as well as the vanilla and salt.

Whisk until smooth.

Any sauce that you don't use for the Samoa ice cream can be refrigerated for two weeks. Simply rewarm for a few seconds in the microwave and stir before using.

Hot Fudge Sauce Ingredients

Milk
chocolate chips

Hot Fudge Sauce Directions

Pour the milk and chocolate chips into a microwave-safe bowl. The more milk you use, the thinner the sauce will be. I like to use about a 1/2 milk to 1 part chocolate chip ratio.

Heat in the microwave in 20 second increments, stirring after each 20 seconds, until the chocolate is completely melted.

Wednesday, December 22, 2010

Candy Cane Sugar


I like sprinkling crushed candy canes on Christmas treats, but if you don't crush the candy canes enough, you're left with huge jagged chunks that aren't so fun. I saw a picture of peppermint sugar on Tastespotting and decided to give it a try. I like how finely crushed the candy canes are, and combined with the sugar, they give a sparkly touch to special treats.

Candy Cane Sugar
Source: Tastespotting and Pip & Ebby

Ingredients

1 cup granulated sugar
candy canes (however many you want)

Directions
Break up the candy canes into large chunks (you can skip this step if you're using mini candy canes)/
Put the sugar and the candy canes in the bowl of a food processor. Turn it on and process until you have the desired size. I like mine mostly fine, with a few small chunks.

Store in a airtight container or ziplock bag. Sprinkle on top of cake balls, peppermint bark, cookies, cakes, or whatever treats you like!

Friday, December 3, 2010

Pumpkin Pie

My first Thanksgiving away from home was my junior year of college. Going to school in northern California meant that I was an 8 hour drive away from home; I had no desire to make the long trek down the 5, and being a broke college kid meant I couldn't afford holiday airfare home. Much to my parents chagrin, I decided to stay in the Bay Area and drive down to Santa Cruz for Thanksgiving dinner with a high school friend who was attending UCSC.

I made a few pumpkin pies, packed up my car, and headed off to Santa Crux aftr dropping off some friends in San Jose. Everyone was worried about me though, since my car wasn't the most reliable--in fact, it had a penchant for breaking down at the worst possible moment. And of course, why would Thanksgiving be any different. Alone on a windy, two-lane road in the Santa Cruz Mountains, halfway between San Jose and Santa Cruz, my car puttered and jerked to a halt right at a bend in the road. There was no getting it started again, so I pulled out my cell and made some calls...a short while later, AAA was there to give me a lift back to my friend's house in San Jose, the pies still sitting in the back seat.

Though sitting on that mountain road was pretty scary, that turned out to be a great Thanksgiving. We never did eat the pies though, as my hosts already had a full spread prepared. But every year I make the same recipe and laugh when I think about that first Thanksgiving away from home.

This pie is a family favorite; it's bold, spicy flavor puts store-bought--and even the Libby's pumpkin recipe--to shame. I use canned pumpkin, but you can also roast your own pumpkins for the puree.

Ingredients
1 ½ cup pumpkin puree
2 beaten eggs
½ teaspoon vanilla
1 teaspoon cinnamon
¼ teaspoon each ground mace and cloves (sub nutmeg for mace if you don't have any mace)
¾ cup brown sugar
½ cup evaporated milk
½ teaspoon each salt, ginger and nutmeg
9” pie shell (I use Martha Stewart's pate brisee recipe)

Directions

Pre-heat oven to 450 degrees. Press pie dough into greased 9" pie pan.

In a large bowl, mix ingredients together in the order given. Pour into unbaked pie shell and bake at 450 degrees for 15 minutes.

Reduce heat to 350 degrees and bake another 45 minutes.

Cool before serving. Garnish with whipped cream, if desired.

Wednesday, November 24, 2010

Pumpkin Custard


Tomorrow is Thanksgiving--are you ready?! The husband and I are hosting Thanksgiving for the second time this year and I've been planning the menu since about September. My original menu had about 3 sides and 15 desserts, but I've since changed it up a bit and reduced the amount of desserts to just three. Believe me, I'd much rather eat dessert for dinner than "real" food, but I know I'm kind of alone on this one, and since I shouldn't be eating too many sweets, I figured I shouldn't create a bunch of leftover treats either. Boo.

Even though I plan to indulge on Thanksgiving, I do want to have a "less guilt" dessert option, so I don't completely jump off the South Beach train. These pumpkin custards are a nice option for people following South Beach or who are just watching their sugar intake. I tweaked the recipe a bit to include more spices, as the original only called for a little nutmeg and cinnamon; I like my pumpkin to have a bolder flavor.


Pumpkin Custard
Source: Adapted from Reverse Diabetes: Holiday Recipes
Printable Recipe

Ingredients
2 large eggs
2 egg whites
1/2 cup sugar
1 Tablespoon agave syrup
3/4 cup pumpkin puree
2 teaspoons cinnamon
1 1/2 teaspoons ground nutmeg
1/2 teaspoon ground ginger
1/2 teaspoon ground cloves
1/2 teaspoon all spice
1/4 teaspoon salt
1 teaspoon vanilla
1 1/2 cups low fat milk

whipped cream, for topping

Directions
Preheat your oven to 325 degrees. Line a roasting pan with a kitchen towel to prevent the custard cups from sliding around. Bring a large pot of water to boil.

In a large bowl, whisk together the eggs, egg whites, sugar and agave until smooth. Add the pumpkin puree, cinnamon, nutmeg, ginger, cloves, all spice, salt, and vanilla. Whisk until blended; whisk in the milk.

Pour the mixture into six 6 ounce (3/4 cup) ramekins. Set the custard cups on top of the towel in the pan and slowly pour the boiling water into the pan, until it reaches about halfway up the sides of the cups.

Gently place the roasting pan in the oven and bake for 50-55 minutes, until the custards are set.
Remove the roasting pan from the oven and place the ramekins on a wire rack to cool.

Refrigerate for at least an hour, or until completely cooled. Serve with whipped cream if desired,

Monday, November 22, 2010

Pumpkin Pie Bars


Well, it's almost Thanksgiving, so hopefully you have your menu for this year's turkey dinner planned out. But, if you're still looking for another addition to the dessert table here's a fun spin on pumpkin pie! These bars have the soft consistency of traditional pumpkin pie and the butterscotch chips add an element of flavor that pairs so well with the pumpkin.

Pumpkin Pie Bars
Source: Annie's Eats and Joy the Baker

Printable Recipe


Crust and Topping Ingredients
1 1/3 cups all-purpose flour
¼ cup granulated sugar
½ cup brown sugar, firmly packed
12 Tablespoon cold unsalted butter, cut into pieces
1 cup old-fashioned oats
½ cup chopped pecans
Butterscotch chips, for topping (use as many as you like)

Filling Ingredients
8 ounces cream cheese, softened
½ cup sugar
3 large eggs
1 (15 oz.) can pumpkin puree (about 1 3/4 cup)
1 Tablespoon pumpkin pie spice
1 teaspoon vanilla extract

Directions

Preheat your oven to 350 degrees.

Line a 9×13-inch baking pan with foil,folding the foil over the edges of the pan. Lightly grease the foil.

Combine the flour, granulated sugar and brown sugar in a small mixing bowl and mix with a fork. Add the pieces of butter to the dry ingredients and cut it in with a pastry blender until the mixture resembles coarse crumbs (you can also do this in a food processor or with a fork). Stir in the oats and chopped pecans.

Reserve 1 cup of the crust mixture and set aside. Add the remaining crust mixture to the prepared baking pan and press onto the bottom of the pan in an even layer.

Bake the crust alone in the oven for 15 minutes. In the meantime, prepare the filling.

To make the filling, combine the cream cheese, sugar, eggs, pumpkin puree, pumpkin pie spice and vanilla in the bowl of a stand mixer fitted with the paddle attachment. Mix on medium speed until smooth and well combined.

Once the crust has been removed from the oven, pour the filling into the pan and smooth over the crust. Sprinkle the filling with the reserved crumb mixture and butterscotch chips.

Bake for 25 minutes, remove from the oven and transfer to a wire rack to cool. Slice and serve.

Sunday, September 19, 2010

An Apple A Day


The calendar says fall, but here in sunny southern California, the temperatures still shout summer. Just yesterday, we hit record-breaking temperatures, including a scorching 111 degrees where I'm at! Not fun when you park on the wrong end of campus and have to walk about 2 miles from the parking lot to your class, followed by taking the stairs up to the 6th floor. yuck. It was still 97 degrees when my class ended at 7pm!

After an incredibly hot August, and now September, I'm ready for it to start feeling like fall, and I felt like an apple spice cake with a maple cream cheese frosting would be just the thing. When I was googling I came across Bakerella's Apple Cake Pops (which she made with chocolate cake) and *knew* I needed to combine the cake pops idea with the apple spice cake recipe for a fun fall treat!

With a 3 hour professional development training scheduled after an already long school day, my principal thought snacks might help the pain of staying at work until 6pm on a Monday night, so she asked me to bake up some cookies. But instead, I brought these apple cake pops!

Apple Cake Pops
Source: Cake and frosting from Eggs on Sunday
Cake Pop idea from Bakerella

Cake Ingredients
1 1/2 cups whole wheat pastry flour
1 teaspoon baking powder
1 teaspoon ground cinnamon
1/4 teaspoon ground cloves
1/4 teaspoon ground ginger
1/4 teaspoon ground nutmeg
1/4 teaspoon baking soda
1/4 teaspoon salt
1/2 cup unsalted butter, softened
3/4 cup firmly packed light brown sugar
1 teaspoon vanilla
2 large eggs
2/3 cup plain Greek yogurt
2 tart apples, peeled and diced small

Cake Directions

Preheat your oven to 350 degrees.

Butter and flour a 9 x 13" baking pan (Eggs on Sunday reccomends an 8" or 9" pan, but since I was making the cake into pops, I wasn't so concerned with a thick fluffy cake.).

In a medium bowl, whisk together the dry ingredients (flour through salt). Set aside.

In the bowl of an electric mixer with the paddle attachment, beat the butter on medium speed until creamy, about 1 minute.

Gradually add the brown sugar and continue beating on medium-high speed until well blended and light, about 2 minutes.

Add the vanilla, then the eggs, one at a time. Beat well after adding each egg, and scrape down the sides of the bowl as needed.

Reduce the speed to low and add the flour mixture in three additions, alternating with the yogurt, in two additions. Mix just until blended. Turn off the mixer, add the diced apple and stir by hand.

Scrape the batter into the prepared pan and smooth the top. Bake for about 30 minutes, until the top is light golden brown and a tester inserted into the middle comes out clean.

Let cool for about 5-10 minutes, then crumble the cake into a large bowl. Finish cooling the cake in the refrigerator while you make the frosting.

Frosting Ingredients

6 ounces cream cheese, softened
3 Tablespoons unsalted butter, softened
1/2 teaspoon vanilla
1/8 teaspoon ground cinnamon
1/8 teaspoon ground ginger
pinch ground nutmeg
pinch salt
1 Tablespoon pure maple syrup (NOT fake syrup! Spring for the real deal here)
1 cup confectioner's sugar

Frosting Directions
Using an electric mixer, beat together the cream cheese and butter on medium speed, until smooth.

Add the vanilla, maple syrup, spices and salt. Reduce the speed to low and add the confectioner’s sugar. Beat until well blended. Increase the speed to high, and beat until light and creamy, about 2 minutes.

Mix into the cooled, crumbled cake.

Cake Pop Materials

Lollipop sticks (I needed 2 bags. Buy them in the cake decorating section at Michaels)
Pretzel rods, ends broken off into about 1/4" pieces
Green sprinkles (I used small star-shaped sprinkles. Be creative!)

Making the Cake Pops

After mixing the frosting into the cake, being sure it is evenly combined, shape about 1-2 Tablespoons into balls, using your hands. I got about 40 or so cake balls out of this cake recipe.

Set the balls on a piece of wax or parchment paper and chill until firm, about 10-15 minutes in the refrigerator. Once the cake has firmed up, melt the candy melts in the microwave and stir until smooth. Dip the end of a lollipop stick into the melted candy and then gently push into the center of each cake ball.

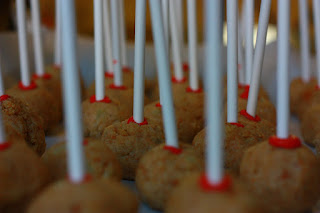
That's a lot of cake pops!

Return to the refrigerator for another 5 to 10 minutes to allow the melted candy to firm up on the sticks.

Rewarm the melted candy in the microwave for about 15 seconds, stirring until smooth. Make sure the candy is completely melted and free of lumps. Gently dip the cake pops into the candy melt, completely covering each cake ball.

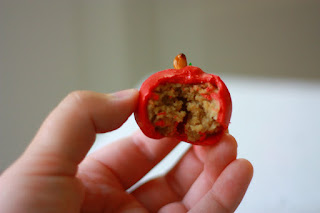
Gently lift the cake ball out of the melted candy and lightly tap off the excess. Stick the end of the lollipop stick into a thick block of styrafoam. Immediately, press the end of a pretzel stick into the top of each "apple" and add a green sprinkle. I found it was easiest to place the sprinkles with a pair of (clean!!) tweezers.


Let sit until the candy coating is completely dried and has firmed up.
Monday, August 16, 2010

Pomegranate Semifreddo and Blueberry Sorbet Bars


First off, I apologize for the long delay in posting!! My laptop was at the Apple store, undergoing repairs for the past several days, and since all my pictures are stored on my laptop, I couldn't post. Also, I recently decided to delete a TON of pictures out of my iPhoto application, hoping it would help speed up my slooooooow computer. In my purging, I deleted photos of several dishes I had not yet blogged....and iPhoto was the only place I'd stored those particular photos. *sigh* That is just like when I decide to clean my house and then throw away, or otherwise misplace, papers that I actually need.

Ok, without further ado, the creamy deliciousness that is pomegranate semifreddo and blueberry sorbet. Another blogger made a similar creation, using completely different flavors recently, adapted from a recipe in Gourmet. I instantly looked up the original Gourmet recipe and decided with my flavor changes, this would be a great dessert for my dad's birthday dinner. He loves blueberry desserts, but I didn't want to make something ordinary, like a pie, so I set out to make this cool concoction.


Semifreddo is Italian for half-cold and refers to any chilled or frozen desserts, including cakes, pies, ice cream, and custards (thank you Google and Epicurious!). The semifreddo in this dessert is a frozen creamy delight, not really ice cream, but not a custard either. I just called it yum.

When freezing your dessert, make sure your pan or container lies flat in the freezer or the contents will slide, making for an uneven, though still deliciously edible, dessert. I used frozen blueberries for the sorbet, as that's what I had on hand, but I bet this would be even better with fresh! Also, the sorbet in this dessert is modified from the blueberry sorbet I made previously; either one would work well here.

I'd recommend making this a day in advance in order to give it enough time to fully freeze; I made mine just a few hours before my parents came over for dinner and it wasn't fully set once it was time for dessert. We ate it anyway, but I would've liked it to have been perfectly ready.

What flavor combination would you use for this dessert?


Pomegranate Semifreddo and Blueberry Sorbet Bars
Source: Semifreddo adapted from
Gourmet, Blueberry Sorbet adapted from The Perfect Scoop
Printable Recipe


Blueberry Sorbet Ingredients
4 cups blueberries
1 cup water
1/3 cup sugar + 1-2 Tablespoons sugar
1/2 Tablespoon Limencello

Semifreddo Ingredients
1
(14-oz) can sweetened condensed milk
1 Tablespoon lime juice
1/2 cup pomegranate juice
1/2
cup chilled heavy cream
blueberries and/or pomegranate seeds for garnish, optional
Sorbet Directions
Line a 9 X 9 pan with plastic wrap.

Combine all ingredients in a blender and blend until smooth.

Strain the mixture to remove the skins and seeds (you definitely want to do this unless you want all your guests to wind up with blueberry stuck in their teeth!).

Freeze in your ice cream maker, following manufacturer's directions.

Smooth into the 9 x 9 pan and place in the freezer, ensuring it is on a level surface.

Semifreddo Directions
Whisk together condensed milk, lime juice, and pomegranate juice.

Beat the chilled cream until it just holds stiff peaks, then gently fold into the condensed-milk mixture.

Spread over the blueberry sorbet, smoothing the top. Freeze until solid, at least 2 hours, ensuring the pan is on a level surface in your freezer.

Cut into bars and garnish with fresh blueberries and/or pomegranate seeds, if desired. Keep remaining portions in the freezer.

Friday, July 9, 2010

Cinnamon Ice Cream


What can I say? David Lebovitz knows ice cream. His cookbook, The Perfect Scoop, is the Bible of ice cream recipes, in my opinion. Every batch of ice cream I've made from his tome has been a definite home run, and this was no exception.

As always, the ice cream was smooth, creamy, and perfectly flavorful. The recipe calls for 10 cinnamon sticks to be steeped in the milk and cream for an hour--this imparts a warm, spicy-sweet flavor that is the star of the dish. It reminded me slightly of Red Hots candy, but was also Christmasy; this would pair wondefully with a warm slice of apple pie or pumpkin pie on Thanksgiving. It's a perfect summer treat as well. In fact, I don't know when this ice cream wouldn't be a good addition to the table.

I bought my cinnamon sticks in bulk in the Hispanic aisle of the grocery store, located next to the other bulk spices.

Cinnamon Ice Cream

Source: The Perfect Scoop

Printable Recipe


Ingredients

1 cup whole milk
3/4 cup sugar
pinch salt
10 cinnamon sticks, broken up
2 cups heavy cream
5 large egg yolks

Directions
In a medium saucepan, warm the milk, sugar, salt, cinnamon sticks and 1 cup of the heavy cream. Once warm (not boiling), cover, remove from the heat and let steep at room temperature for one hour.

Rewarm the cinnamon-infused milk. Remove the cinnamon sticks with a slotted spoon and discard them. Pour the remaining one cup heavy cream into a large bowl and set a mesh strainer on top.

In a separate medium bowl, whisk the egg yolks together. Slowly pour the warm cinnamon-milk mixture into the egg yolks, whisking constantly. (Note: I temper the eggs by pouring just a small amount of the warmed milk in first and whisking, before slowly pouring in the remaining milk mixture.) Scrape the warmed egg yolks back into the saucepan.

Constantly stir the mixture over medium heat with a spatula, scraping the bottom as you stir, until the mixture thickens and coats the spatula. Pour this custard through the strainer and into the heavy cream. Stir until cool over an ice bath.

Chill in the refrigerator overnight, then freeze in your ice cream maker according to manufacturer's directions. Scrape into a freezer safe storage container (I use Gladware) and freeze.

Wednesday, June 16, 2010

Cherry Pie


The husband and I went to my parents' house, along with my brother and his wife, for a Memorial Day BBQ and my mom asked me to bring a dessert. I figured what better way to kick off the summer than with a cherry pie?

Though the picture is pathetic, this was a really tasty pie. Make sure you use tart cherries; the sugar will make sweet cherries too sweet for this recipe.


Cherry Pie

Source: Shared by an online cooking acquaintance (from Musselman's canned cherries)

Printable Recipe

Ingredients

2 cans (14.5 ounces each) red tart pitted cherries
1 cup reserved cherry juice
1 cup sugar
3 Tablespoons cornstarch
1 Tablespoon butter
1/4 teaspoon almond extract

Directions
Pre-heat oven to 425 degrees. Grease a 9" pie dish and gently press in a pie crust.

Drain the cherries, making sure to reserve 1 cup of the liquid.

Mix the sugar and cornstarch together in a heavy saucepan. Gradually stir in the reserved cherry liquid until the mixture is smooth. Cook over medium heat until the mixture bubbles.

Cook an additional minute until the mixture is thick.

Remove from heat and stir in butter, cherries, and almond extract.

Pour into prepared crust. Top with a lattice or vented crust (I cut out pie crust starts to top my filling).

Bake at 425 degrees for 10 minutes. Reduce oven temperature to 350 and bake 25-35 minutes, until the crust is golden brown. (Note: I placed my pie on a baking sheet to capture any boil over of the pie filling.)

Wednesday, May 26, 2010

Summery Fruit Salad


I'm back with a healthy recipe, here people. Consistently inconsistent, right?

I made this refreshing fruit salad to keep as a quick snack and easy healthy lunch item for week day lunches. I actually meant to include jicama in it as well, but forgot to pick some up at the store. The husband requested grapes be included, but they were super expensive for some reason, and they didn't actually look that great, so I opted to leave them out this time. But that's the great thing about fruit salad, you can really just throw in whatever you want: pineapple, grapes, oranges, papaya, whatever.

I decided to use a squeeze of lime juice instead of dressing to keep the salad simple and healthy, as well as let the flavors of the fruit shine through. The lime juice gives all the fruit a nice tang and the basil adds an interesting savory-sweet depth of flavor.

Summery Fruit Salad
Source: A Cooking in Cucamonga Original
Printable Recipe


Ingredients
1/2 a small seedless watermelon
1 pound strawberries
2 pints blueberries
2 kiwi
1 champagne mango
4-5 small basil leaves
juice of 1 lime

Directions
Rinse all fruit well. Remove the strawberry stems, peel the kiwi and mango, julienne the basil, and cut the watermelon into chunks.

Toss all of the fruit together in a large bowl with the lime juice. Refrigerate until it is time to serve.

Tuesday, May 25, 2010

Nutella Brownies

Note: sorry for the poor photo. I baked these in the evening, after the natural light was gone, and we didn't cut into them until several hours later when it was pitch black out, so I didn't even try a photo then.

I hope you caught the irony in this post after yesterday's narration. First I give you a recipe for veggie kabobs and tell you all about the new healthy lifestyle the husband and I are embarking upon, then I follow up with a post about Nutella brownies.

What can I say, I'm consistently inconsistent. (Dead Like Me reference, anyone?)

That, and who can resist Nutella? Especially when the BIG jar is on sale.

I made these brownies for some friends of ours who were visiting from Santa Barbara, just as a sweet treat and a thanks for always thinking of us when they're in town. Everyone raved about how good they were :), and I just had to agree. The best part of making these brownies? The night of drinks with friends that followed, and a dozen fresh chicken eggs from another good friend (thanks again Peggy!).

I modified a brownie recipe from Baker's chocolate, but you could use any basic brownie recipe you like, even a boxed mix, and just swirl in the Nutella. I ran out of white AP flour while making these brownies, so I used half white, half wheat and no one was any wiser.

Nutella Brownies
Source: Adapted from Baker's Chocolate
Printable Recipe

Ingredients
4 squares unsweetened chocolate
3/4 cup butter (1 1/2 sticks)
2 cups sugar
1 teaspoon vanilla
3 eggs
1 cup flour
1 Tablespoon Nutella + another 1/4 cup or so

Directions

Pre-heat the oven to 350 degrees. Line a 9 x 13" pan with foil, then spray with non-stick spray.

Roughly chop the chocolate, then toss in a microwave-safe bowl with the butter. Microwave 1-2 minutes, until the butter is melted and stir to melt the chocolate. Stir until smooth; you may need to microwave for another 15-30 seconds to fully melt all the chocolate.

Stir in the sugar.

Add in the vanilla, eggs, and 1 Tablespoon Nutella and stir until combined. Mix in the flour, then pour the batter into the 9 x 13" pan.

Spoon dollops of Nutella onto the brownie batter, then using a butter knife or a spoon, swirl the Nutella into the brownie batter, creating a marble effect.

Bake for 30-35 minutes, until a toothpick inserted into the center comes out with small fudgy crumbs. Do not overbake!

Wednesday, May 12, 2010

You put the lime in the coconut...


As soon as I saw this recipe for coconut lime bundt cake, that old song sprang to mind. But I have to ask, did Coke used to have a commercial with the lyrics "You put the lime in the coke, you nut, and drink em all up? Because I swear, that is how I remember the song, but when I looked up the lyrics that was not what came up? Anyone?

But, again, I digress. I made this cake for Mother's Day, cutting it in half so I could give half to my mom and the husband could give half to his mom. My mom unwrapped it and my dad immediately said, "Is the other half for the husband's mom?" and laughed when I confirmed. The husband said his mom enjoyed it as well, reaching for a fork as soon as she pulled the foil off.

This recipe calls for shredded coconut; you can use either sweetened or unsweetened, but since I have a sweet tooth and this is a dessert, I went with sweetened. The cake is very moist, light and sweet, with a strong coconut flavor, due to the can of coconut milk. It, however, wasn't limey enough for me, though this could be reconciled by drizzling with a lime glaze.


Coconut Lime Bundt Cake
Source: My Kitchen in the Rockies
Printable Recipe

Ingredients
2 cups flour
1 teaspoon baking powder
pinch of salt
1 can unsweetened coconut milk
4 Tablespoons butter
1/3 cup lime juice (about 7-9 limes)
zest of 2 large limes
1 1/2 cups sugar
1 teaspoon vanilla extract
2 teaspoons dark rum, optional (I used Malibu coconut rum)
3/4 cup shredded coconut
additional butter and flour for greasing pan

Directions
Heat the oven to 350 degrees. Liberally grease a bundt pan with the additional butter, making sure to get it in each depression. Sprinkle the additional flour into the pan, turning it to fully cover the butter. Turn the pan over and gently tap out any extra flour.

Combine the flour, baking powder and salt in a medium bowl. Set aside.

Heat the coconut milk and butter in a small saucepan, just until the butter is melted and the milk is heated through. Stir in the lime juice. Set aside, but keep warm.

Using the whisk attachment, combine the lime zest and sugar in the bowl of an electric mixer. Add the eggs and beat on medium-high for 3 minutes, until the mixture is pale yellow, thick, and doubled in volume. Beat in the vanilla and rum. Scrape down the sides of the mixer with a rubber spatula.

Pour in the dry ingredients and mix on low, stopping to scrape down the sides as needed. Add in the shredded coconut and mix on low just until everything is combined.

Pour in the warm coconut mixture in a steady stream until smooth.

Pour the cake batter into the greased bundt pan and bake for 55-60 minutes, or until the cake is golden brown and a toothpick or butter knife inserted into the cake comes out clean.

Top with a lime-sugar glaze and additional shredded coconut, or just sprinkle with powdered sugar, if desired.

Tuesday, May 11, 2010

Chocolate Overload Nutella-Mousse Brownie Pie


Did you read the title up there? Chocolate Overload Nutella-Mousse Brownie Pie.


Oh. My. God.

Seriously.

Chocolate Mousse.

Brownies.

Nutella.

Nutella...Nutella!!!

This is some serious business. I have a little thing for Nutella.

That's an understatement. Nutella and I have engaged in a love affair in previous years. I had to break it off years ago, it just wasn't a healthy relationship. We first met when I was a young 20-year-old, first venturing out into the world, yet feeling a bit homesick during a stint in London. The first thick spoonful of chocolate, eaten alone in a hostel kitchen, squelched any longings for home right away. I fell hard and fast, head over heels in love.

But then I returned home, went away for the last few years of college, and broke off our love. The thought of all those chocolate-hazelnut calories glomming onto my body kept me away for years. Until I saw this recipe.

Oh.My.God

Yeah, I had to say it twice.

As soon as I saw this chocolate brownie mousse pie I knew I *needed* to make it--Immediately.

Thankfully, the husband had a birthday coming up. There was only one problem: he wanted red velvet cupcakes. Red velvet is my kitchen foe, so I usually resort to buying the Sprinkle's mix from William-Sonoma. So I did what any good wife chocolate-lover would do....I convinced him he should opt for this chocolaty-goodness instead. Happily the chocolate-on-chocolate dessert was a hit, and no mention of red velvet was made again.

I may have also licked the Nutella jar clean. But that's just between you and me.

Chocolate Overload Nutella-Mousse Brownie Pie

Source: Adapted from Sing for Your Supper, brownie recipe from Baker's Chocolate

Printable Recipe


Brownie Ingredients

4 squares unsweetened chocolate

1 1/2 sticks butter

2 cups sugar

3 eggs

1 teaspoon vanilla

1 cup flour

Chocolate Mousse Ingredients

1/2 cup + 1 tablespoon Nutella, plus additional for drizzling

1/2 pint (1 cup) heavy whipping cream

2 Tablespoons sugar

1 teaspoon vanilla

5 ounces cream cheese, softened

Directions

Pre-heat oven to 350 degrees. Spray a 9", deep dish pie pan with nonstick spray.

In a microwave-safe bowl, heat the chocolate and butter in the microwave (I did 45 second increments) until the butter is melted. Stir to melt the chocolate.

Stir the sugar into the chocolate, ensuring it is well combined. Add the vanilla and eggs and stir until completely combined. Add in the flour, stirring until well blended.

Pour the brownie mixture into the pie pan and bake for 35-45 minutes, or until a toothpick inserted in the center comes out clean (mine actually took about 55 minutes).

Remove from the oven and allow to cool, in the pie pan, on a wire rack.

Once the brownies are completely cooled whip the cream, vanilla and sugar in a mixing bowl, using the whisk attachment, until stiff peaks form. Spoon into another bowl and set aside.

In the same mixing bowl (no need to wash), mix the cream cheese and Nutella, with the paddle attachment, until well combined.

Gently fold in half the whipped cream with a spatula. Repeat with the remaining whipped cream, gently folding until the whipped cream is fully incorporated. Do not stir or you will lose the fluffiness of the whipped cream.

Using a large spatula, spread the mousse over the cooled brownies. Spoon the remaining Nutella into a small ziplock bag. Snip off the corner and pipe over the mousse. Refrigerate until ready to serve.


The birthday husband wearing his new Niners jersey and posing with his bday decorations. :)


Wednesday, April 14, 2010

Strawberry Sorbet


I actually made this sorbet before I made the kiwi sorbet--well like one day before. Strawberries were on sale for less than a $1 a pound, so I quickly scooped up 5 pounds, knowing I wanted to make the strawberries and cream cake and this sorbet.

Just like the kiwi sorbet, this was refreshing and it tasted like fresh sweet strawberries here. Be sure to use ripe strawberries or the flavor won't be as pronounced.


Strawberry Sorbet

Source: inspired by Deliciously Organic
Printable Recipe


Ingredients


2 cups sliced strawberries
1/3 cup orange honey (you can use regular honey)
3/4 cup water
juice of one lime
1/4 cup strawberry syrup (the liquid from tossing sliced strawberries in sugar)

Directions

Heat the water and honey in a saucepan, just until the honey melts.

Combine all ingredients in a blender and puree until smooth.

Chill in the freezer for 15 minutes and then freezer in your ice cream maker.

Friday, April 9, 2010

Kiwi Sorbet


I love having a Costco membership; I think we save a lot of money buying our toilet paper, paper towels, and laundry detergent in bulk. Their baby back ribs are a great price and we always run in for movie tickets before heading out to the theater. But other times, I think buying bulk is not so great. I mean there are only two of us and we can't eat ALL that food, but I hate when things go to waste.

Case in point: the 5 pounds of kiwi I recently bought. The husband loves kiwi, so last time I was at Costco I picked up a container of the fruit for him. He ate a few, but the majority of the kiwis were still sitting on the counter 2 weeks later. Luckily I stumbled upon this recipe, which I immediately bookmarked to use up all those kiwi.

The sorbet is really refreshing and fruity. It tasted kind of tart right after I churned it, but after the hard freeze in the freezer it was sweet and kiwilicious!

Check back soon for my variation using fresh strawberries. Yum!

Kiwi Sorbet

Source: Deliciously Organic

Printable Recipe


Ingredients


2 cups kiwi, peeled and chopped (about 8-10 kiwis)
1/3 cup orange honey (you can use regular honey)
3/4 cup water
juice of half a lemon

Directions
Heat the honey and water in a saucepan, just until the honey melts.

Combine all of the ingredients in a blender and puree until smooth.

Chill the mixture in the freezer for 15 minutes. Freeze in your ice cream maker according to manufacturer's directions.

Thursday, April 8, 2010

Strawberries and Cream Cake


So what did you do for Easter this year? The husband isn't Christian and I am not very religious, so we don't really have any Easter traditions--we just kind of go with the flow each year and do whatever sounds good in the moment.

This year we invited my friend and former college roommate, Cherice, along with her fiance, Kavin, over for dinner. We had a blast; while the guys drank beer and played video games, I had Cherice help me out in the kitchen, roasting chicken and a variety of veggies, mashing potatoes, and making gravy from scratch. To top off a great dinner, I served chocolate mousse and this strawberries and cream cake...with homemade whipped cream!

I think this cake might become our new Easter tradition.


Strawberries and Cream Cake
Source:
The Busty Baker
Printable Recipe


Cake Ingredients

½ cup (1 stick) unsalted butter, room temperature, plus more for pan
1 ½ cups all purpose flour, plus more for pan
2 teaspoons baking powder
½ teaspoon salt
½ cup sugar
2 large eggs, plus 2 large egg yolks
½ teaspoon pure vanilla extract
½ cup milk

Strawberries and Cream Ingredients

1 pound strawberries, hulled and thinly sliced, divided
½ cup sugar, divided
1 teaspoon unflavored gelatin (one ¼-oz envelope)
2 cups (1 pint) heavy cream
1 teaspoon vanilla extract


Directions

Preheat oven to 350F.

Butter an 8-inch round pan, and line the bottom with parchment. Butter and flour parchment and sides.

In medium bowl, sift together flour, baking powder, and salt; set aside.

Cream together butter and sugar in an electric mixer until light and fluffy, about 3 minutes. Add eggs and yolks, one at a time, beating until combined after each addition. Beat in vanilla. With mixer on low, add flour mixture and milk alternately, beginning and ending with flour. Mix until just combined.

Pour batter into prepared pan and smooth top.

Bake until a toothpick inserted in the centers comes out clean, about 25 to 30 minutes. Cool for pan 10 minutes in the pan, then invert onto a wire rack to cool completely.

When cake has cooled, make the strawberries and cream:

In a large bowl, combine half of the strawberries and ¼ cup of sugar; set aside.

Pour 2 tablespoons of cold water in a small saucepan. Sprinkle gelatin over water; let soften for 5 minutes.

Heat saucepan over low heat, stirring constantly, until gelatin has dissolved. Remove from heat and let cool slightly. (It will congeal when cooled completely, but you can dissolve it again by returning it to the heat and stirring.)

In the clean bowl of an electric mixer, fitted with the whisk attachment, beat heavy cream, vanilla extract, and remaining ¼ cup sugar until very soft peaks form.

With mixer still running, gradually add gelatin mixture; beat until soft peaks form.

Assemble the cake:

Using a serrated knife, split the cake in half horizontally.

Place the bottom half, cut side up on a serving plate. Arrange the strawberry/sugar mixture over the bottom cake layer, drizzling any juices in the bowl over top the strawberries. Don't be shy with the juices!

Top with half of the whipped cream, leaving a 1 inch border.

Cover with top half of cake. Top with remaining whipped cream.

Refrigerate cake and remaining strawberries separately, at least 1 hour, up to 1 day. Just before serving, arrange remaining strawberries on top of cake.

Wednesday, April 7, 2010

Almond Poppyseed Bundt Cake


Isn't it funny how sometimes time seems to fly and other times it drags on? And at yet another time it seems to do both? That's how I feel about this school year...some days and weeks just seem to drag on for.ev.er. Others fly by and I can't believe how quickly Monday turns into Friday.

It seems like we started the count down to Spring Break right after Winter Break this year. I remember February winding to a close, and the prospect of the 5 weeks of March, with no scheduled days off, looming large and long in front of us, the only salvation being Spring Break coming right as April entered. The daily Spring Break count down in the teacher's lounge, mocked me as we ate and chatted everyday. Time seemed to slow down and linger in March, taunting me as I looked forward to a week off.

Now I'm right in the middle of Spring Break, and it feels like those long, slow moments of March were a lifetime ago. I can't believe it's *already* April and I am enjoying my days of relaxation at home. Of course, too soon it will be time to go back to work and this break will be just another distant memory. But for now I am enjoying a nice perk of teaching-the breaks!

To celebrate spring and the arrival of break, we had a staff potluck Wednesday before break. When the sign up list came around, I wasn't sure what I wanted to make, beyond knowing I definitely wanted to bake a dessert. Then Joy the Baker posted a poppyseed bundt cake, answering that question for me. I added some almond extract and dusted my finished cake with powdered sugar instead of her blueberry glaze...perfection.


Almond Poppyseed Bundt Cake
Source: Adapted from Joy the Baker
Printable Recipe

Ingredients
2 1/2 cups all purpose flour
1 1/1 cups sugar
1 teaspoon baking soda
1 teaspoon salt
1/3 cup canola oil
1 cup buttermilk
2 large eggs
1 teaspoon white vinegar (I was out, so I used apple cider vinegar, which worked perfectly)
1 teaspoon vanilla extract
1 1/2 teaspoons almond extract
2 Tablespoons poppy seeds
Powdered Sugar

Directions
Preheat the oven to 325 degrees. Grease and flour a 10" bundt cake pan and set aside.

In a medium bowl, whisk together the flour, sugar, baking soda and salt. In another medium bowl, whisk together canola oil, buttermilk, egg, vinegar, almond extract and vanilla extract. Add the wet ingredients to the dry ingredients all at once. Whisk together until just combined and no lumps remain. Stir in the poppy seeds.

Pour the batter into the prepared baking pan and bake for 35-45 minutes, or until a toothpick inserted in the center of the cake comes out clean.

Allow the cake to cool in the pan for 20 minutes. Carefully run a butter knife along the edges of the cake to assure that it is loosened enough before inverting the cake onto a wire rack to cool.

Pour about 2 Tablespoons of powdered sugar into a mesh strainer and sprinkle over the top of the cake.


Friday, March 19, 2010

Chocolate Mousse


The husband has been asking for "something chocolate" lately. He doesn't care what it is....brownies, cake, ice cream....as long as it's chocolate. We finish dinner, clear off the table, comment on how disheveled the kitchen is, and then it comes; "I want something chocolate. Like cake. Or something else." Then he rummages through the cabinets, which contain next to no snack foods, and pulls out the only chocolate we have: chocolate-covered raisins. When you are craving a chocolate snack, chocolate-covered raisins are not the fix.

After browsing through my favorite blogs, I came across this recipe for chocolate mousse. With an easy dinner planned, I decided this would be a delicious and nearly effortless weeknight dessert. As soon as I got home I washed all the dishes piled up in the sink, wiped down the counters, and got to work, finishing just as the husband walked in the door, beat down from a rough day at work. But I think the chocolate helped take the edge off.

Well, that and a nice glass of beer. But I still think this richly decadent chocolate is what really did the trick.


Chocolate Mousse
Source: Annie's Eats
Printable Recipe

Ingredients
7 ounces semi-sweet chocolate, finely chopped
3 tablespoons water
4 eggs, room temperature, whites and yolks separated
pinch salt

Directions
Combine chocolate and water in a saucepan and melt over a pot of simmering water. Stir until the chocolate is nearly melted. Remove from the heat and stir the chocolate until smooth. Set aside to cool to room temperature.

Pour the egg whites and salt into the bowl of your kitchen aid mixer and whip on high with the whisk attachment until they form stiff peaks. This will take a few minutes.

Pour the egg yolks into the cooled chocolate, gently stirring to combine.

Gently fold in 1/3 of the egg whites, just until combined. Fold in the remaining egg whites, just until no white streaks remain.

Chill until you are ready to serve.

Monday, March 15, 2010

Aztec Brownies


The husband had a not so great week at work recently, so I decided to make him a sweet treat, but I didn't want to bake just any ordinary dessert.

Enter these Aztec brownies. Using a standard one-bowl brownie recipe from Bakers Chocolate, I enhanced the flavor with cayenne powder and cinnamon. Those simple additions took these brownies from ho-hum to a treat with a kick! The spiciness of the cayenne sneaks up on your palate, almost as an afterthought, and then lingers, beckoning you to take another bite, finally building to a hot punch. Even though the husband does not share my love of all things spicy, he agreed that the cayenne was a nice addition here.

These brownies are great with a simple sprinkle of powdered sugar on top, but I'm sure a dollop of whipped cream would be a sweet way to cool the heat.

Aztec Brownies
Source: Adapted from
Bakers Chocolate
Printable Recipe

Ingredients
4 squares unsweetened chocolate
3/4 cup butter
2 cups sugar
1 teaspoon cayenne
1 teaspoon cinnamon
4 eggs
1 teaspoon vanilla
1 cup flour
1/2 cup semi-sweet chocolate chips

Directions
Pre-heat the oven to 350 degrees.

Line a 13x9" pan with foil, greasing the foil.

Combine the butter and unsweetened chocolate in a microwave-safe bowl and microwave on high for 2 minutes. Stir the mixture to combine, ensuring that the chocolate is completely melted. (I had to nuke mine for another 45 seconds to finish melting the chocolate.)

Stir in the sugar, cayenne, and cinnamon until combined. Add in the vanilla and eggs, mixing in the eggs one at a time. Stir in the flour and chocolate chips, mixing well.

Pour the batter into the foil lined pan and bake for 30-35 minutes, or until a toothpick inserted in the center comes out with fudgy crumbs. Be sure not to over bake.

LinkWithin

Blog Widget by LinkWithin